Fixing Inspector issues
When you find an issue in Inspector, the problem can due to either tracking implementation or the tracking plan.
If you have not yet installed Inspector, check out the Inspector installation overview.
Fixing an implementation issue found in Inspector
If the implementation is incorrect according to the tracking plan, such that the data coming in is incorrect but the tracking plan is correct, we recommend the following steps:
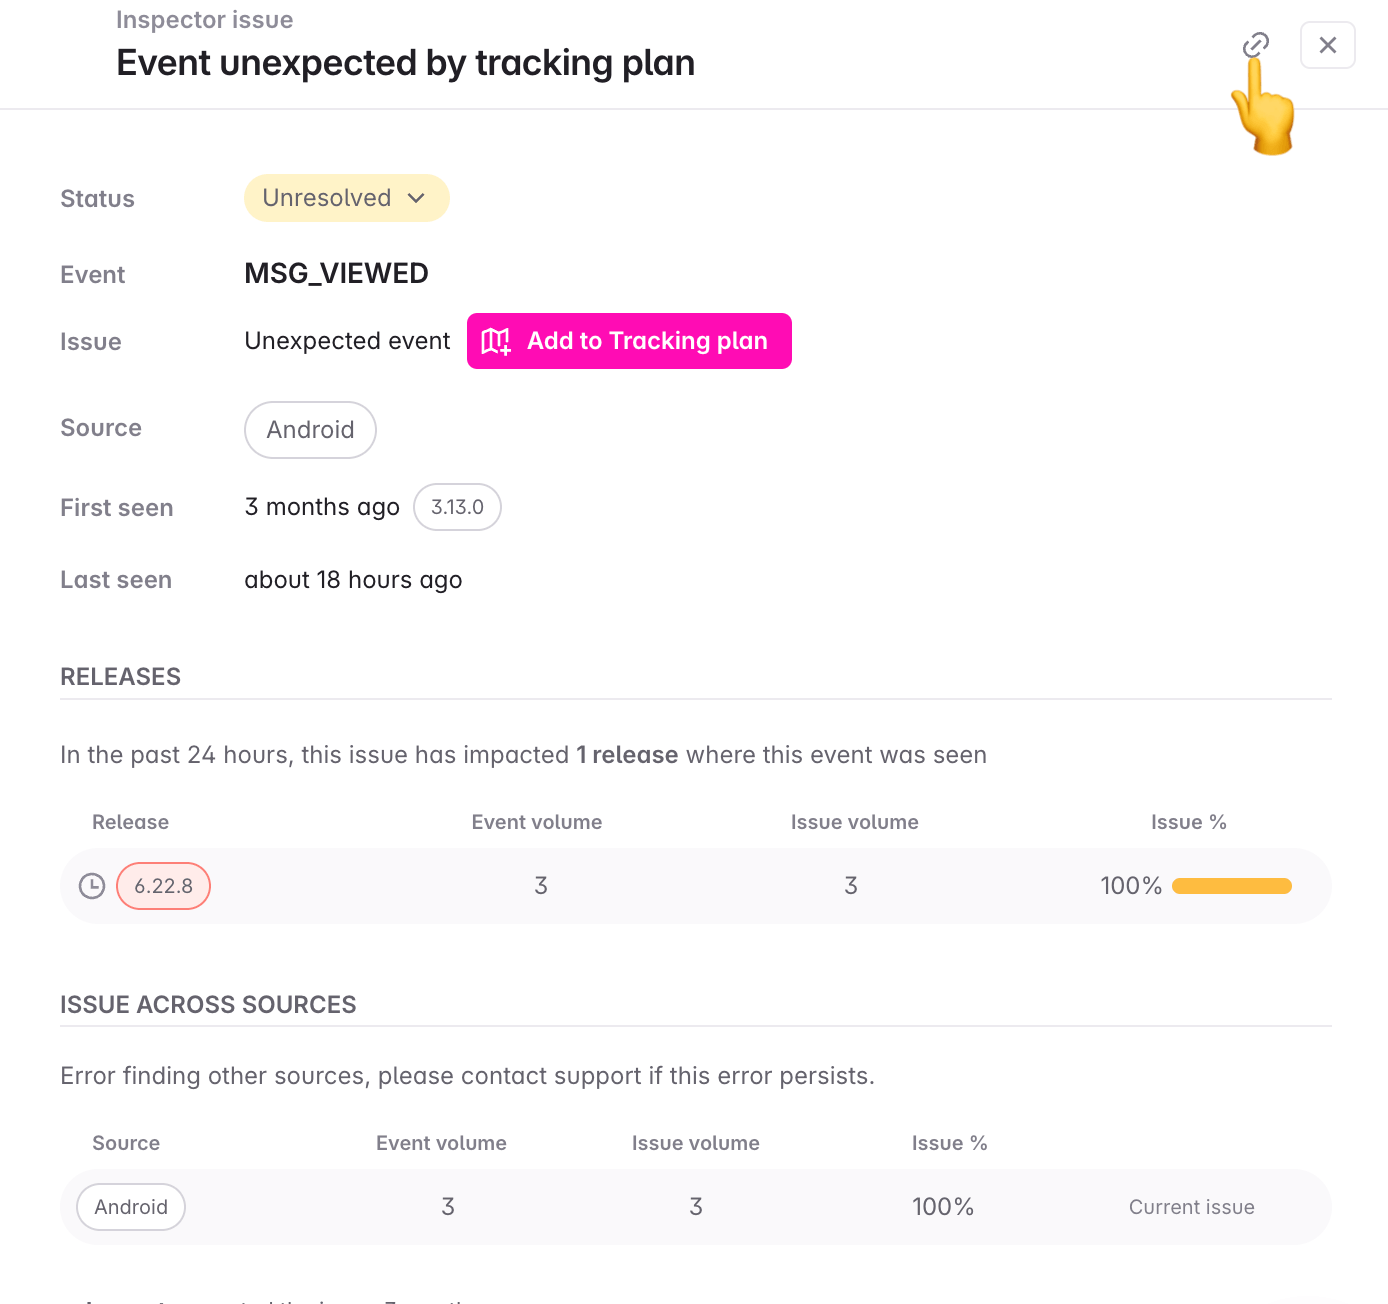
Step 1 - Copy the issue link
In the issue details, copy the link to the individual issue
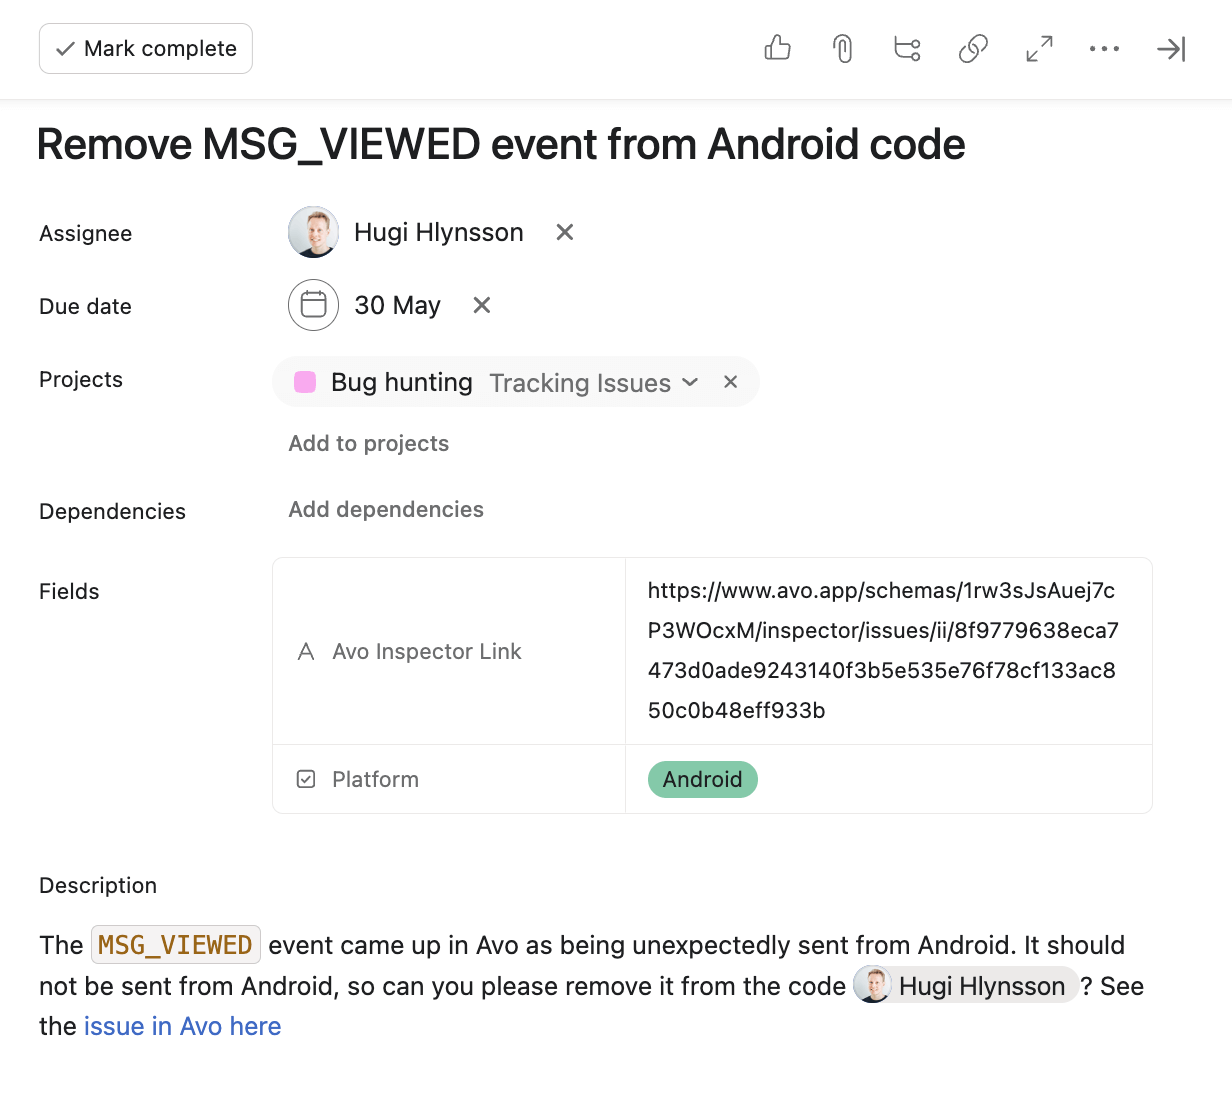
Step 2 - Create a ticket and assign
In your task management system, create a task or ticket and append the issue link and relevant details. Assign the task or ticket to the relevant individual and/or team to investigate and fix the issue in the corresponding code.
Step 3 - Validate
Validate that the issue is fixed by checking the issue details again and verify that it’s not an issue in that version. If an issue is present in the latest version, it will be marked as such.
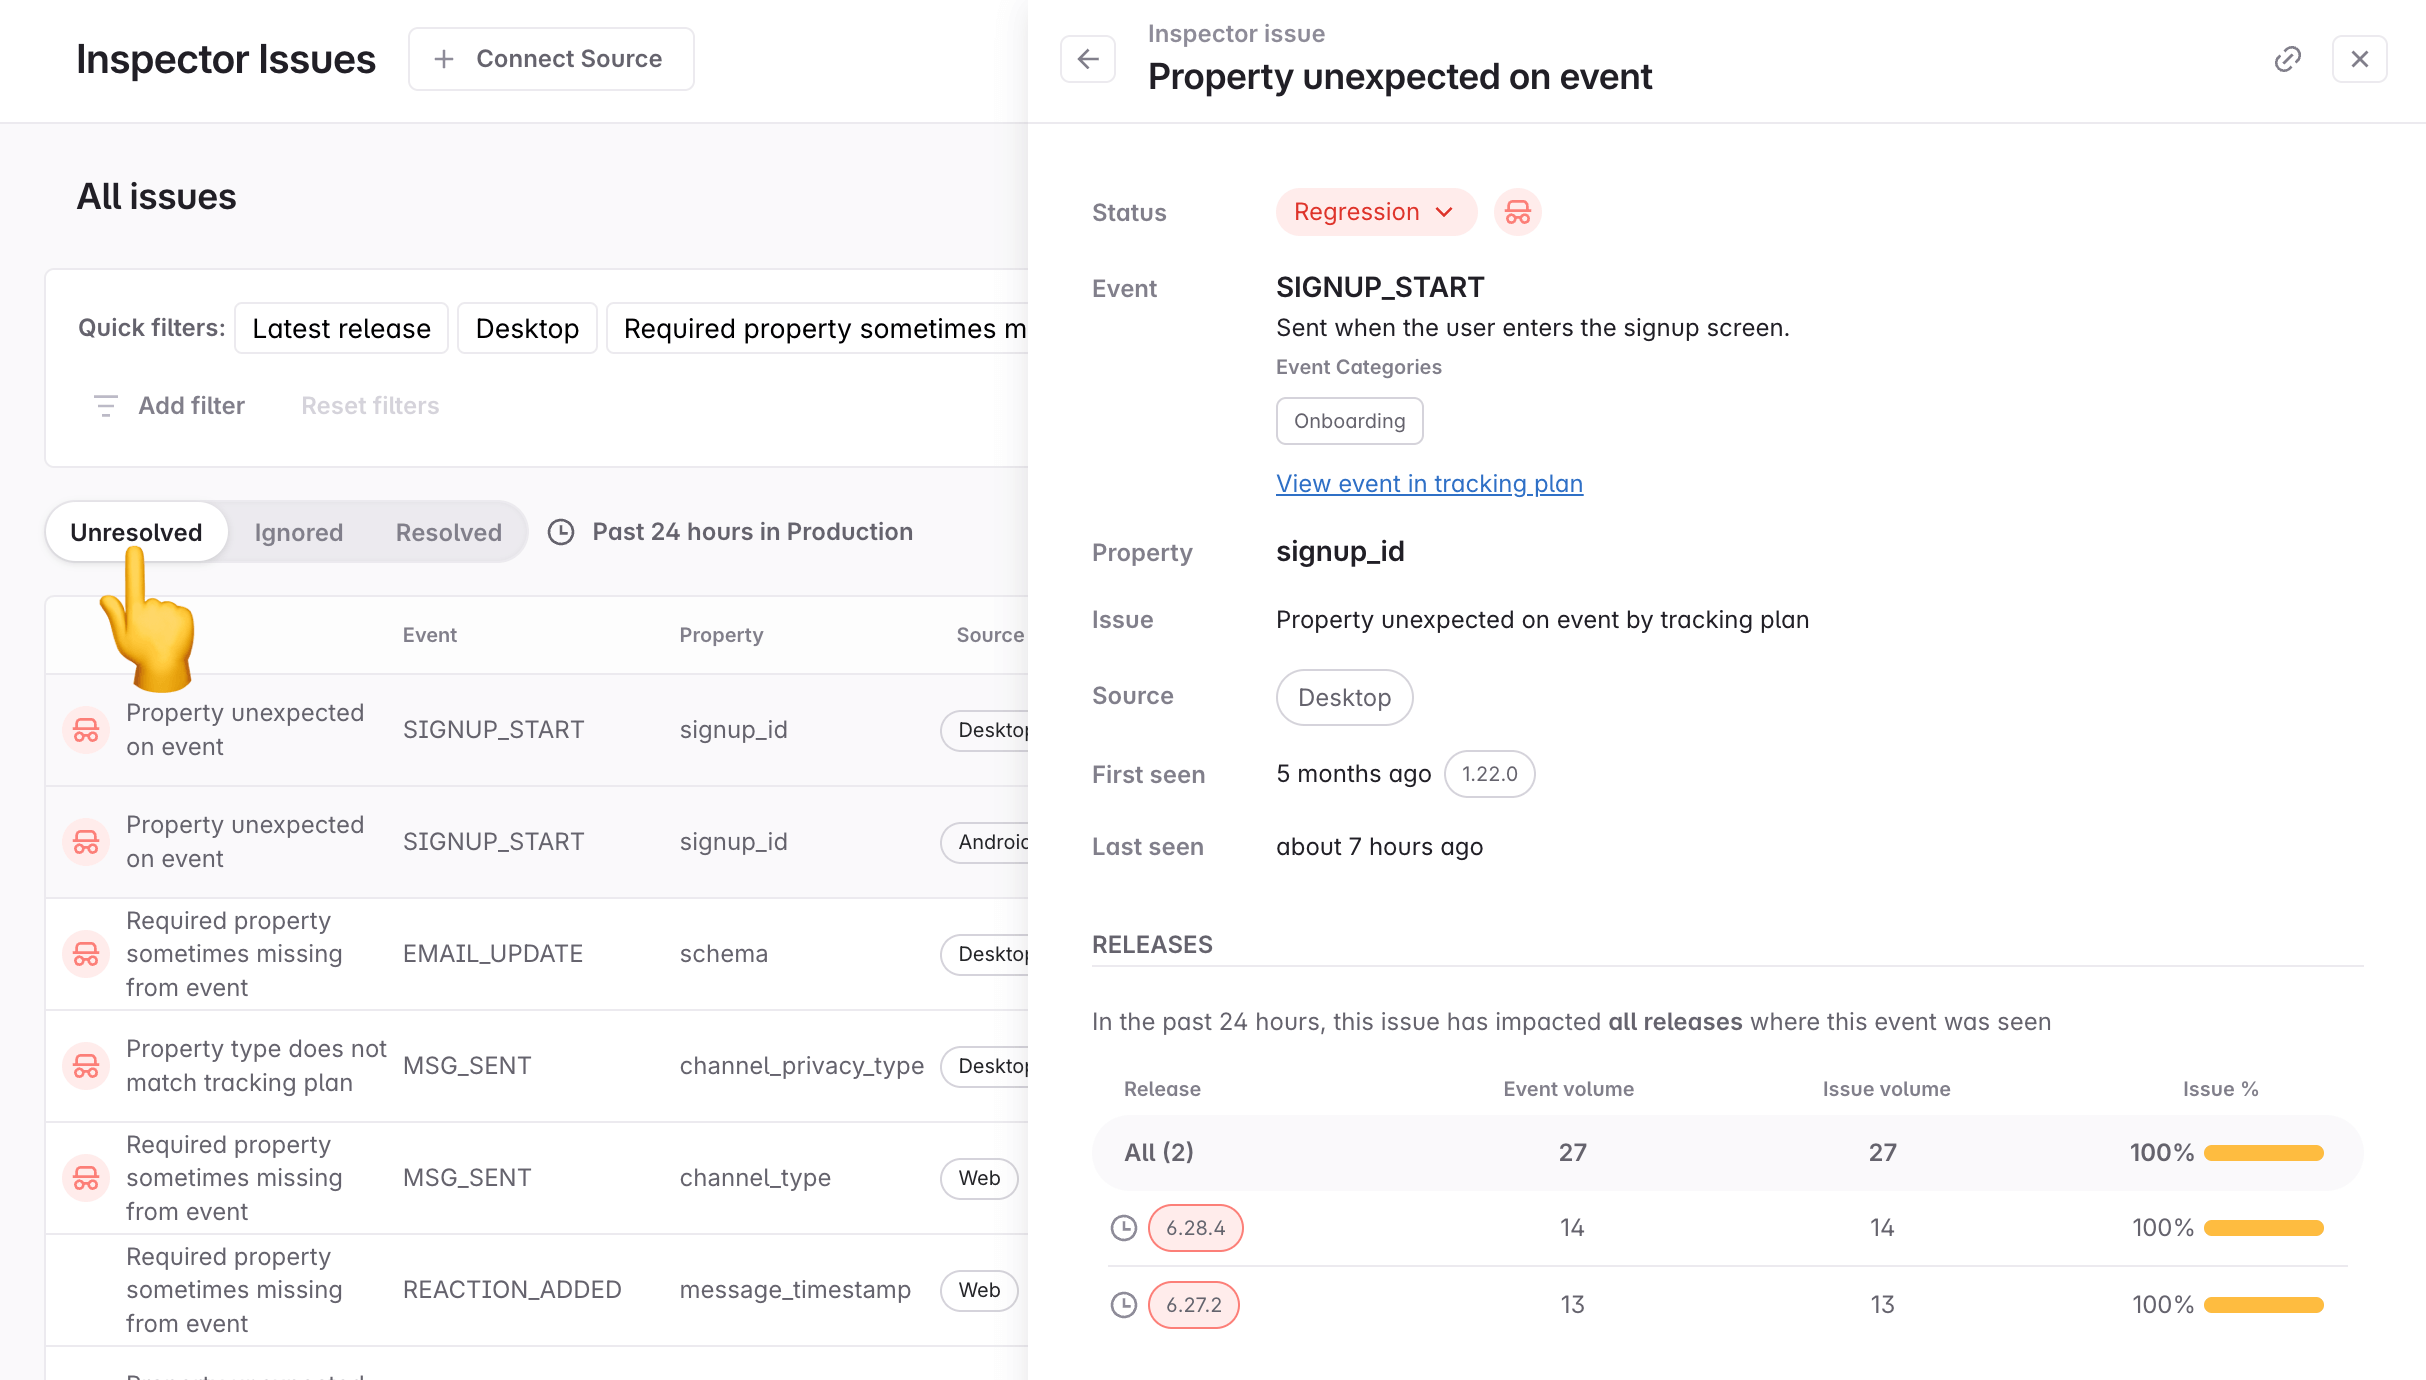
If the issue was resolved in a version before the latest version, you can check what versions Inspector has seen by clicking the button highlighted in the image below:

Step 4 - Resolve issue
Once you have verified that the issue has been fixed in code, you can update the issue status to Resolved for the release it was fixed in. See details about resolved issue status below. If the issue reappears, it will be marked as a regression.
If your fix resolved multiple related issues, you can use bulk actions to resolve them all at once by selecting multiple issues and using the bulk action toolbar.
Fixing a tracking plan issue found in Inspector
If the tracking plan is not representing the event correctly (and the implementation is correct), such as the data coming in is correct and the tracking plan is incorrect, we recommend the following steps:
Step 1 - Fix issue
The first step is to fix the issue in the tracking plan. Depending on the issue, it can either be done by adding the event or property to the tracking plan or fixing an event or property that is already in the tracking plan.
Event or property unexpected by tracking plan
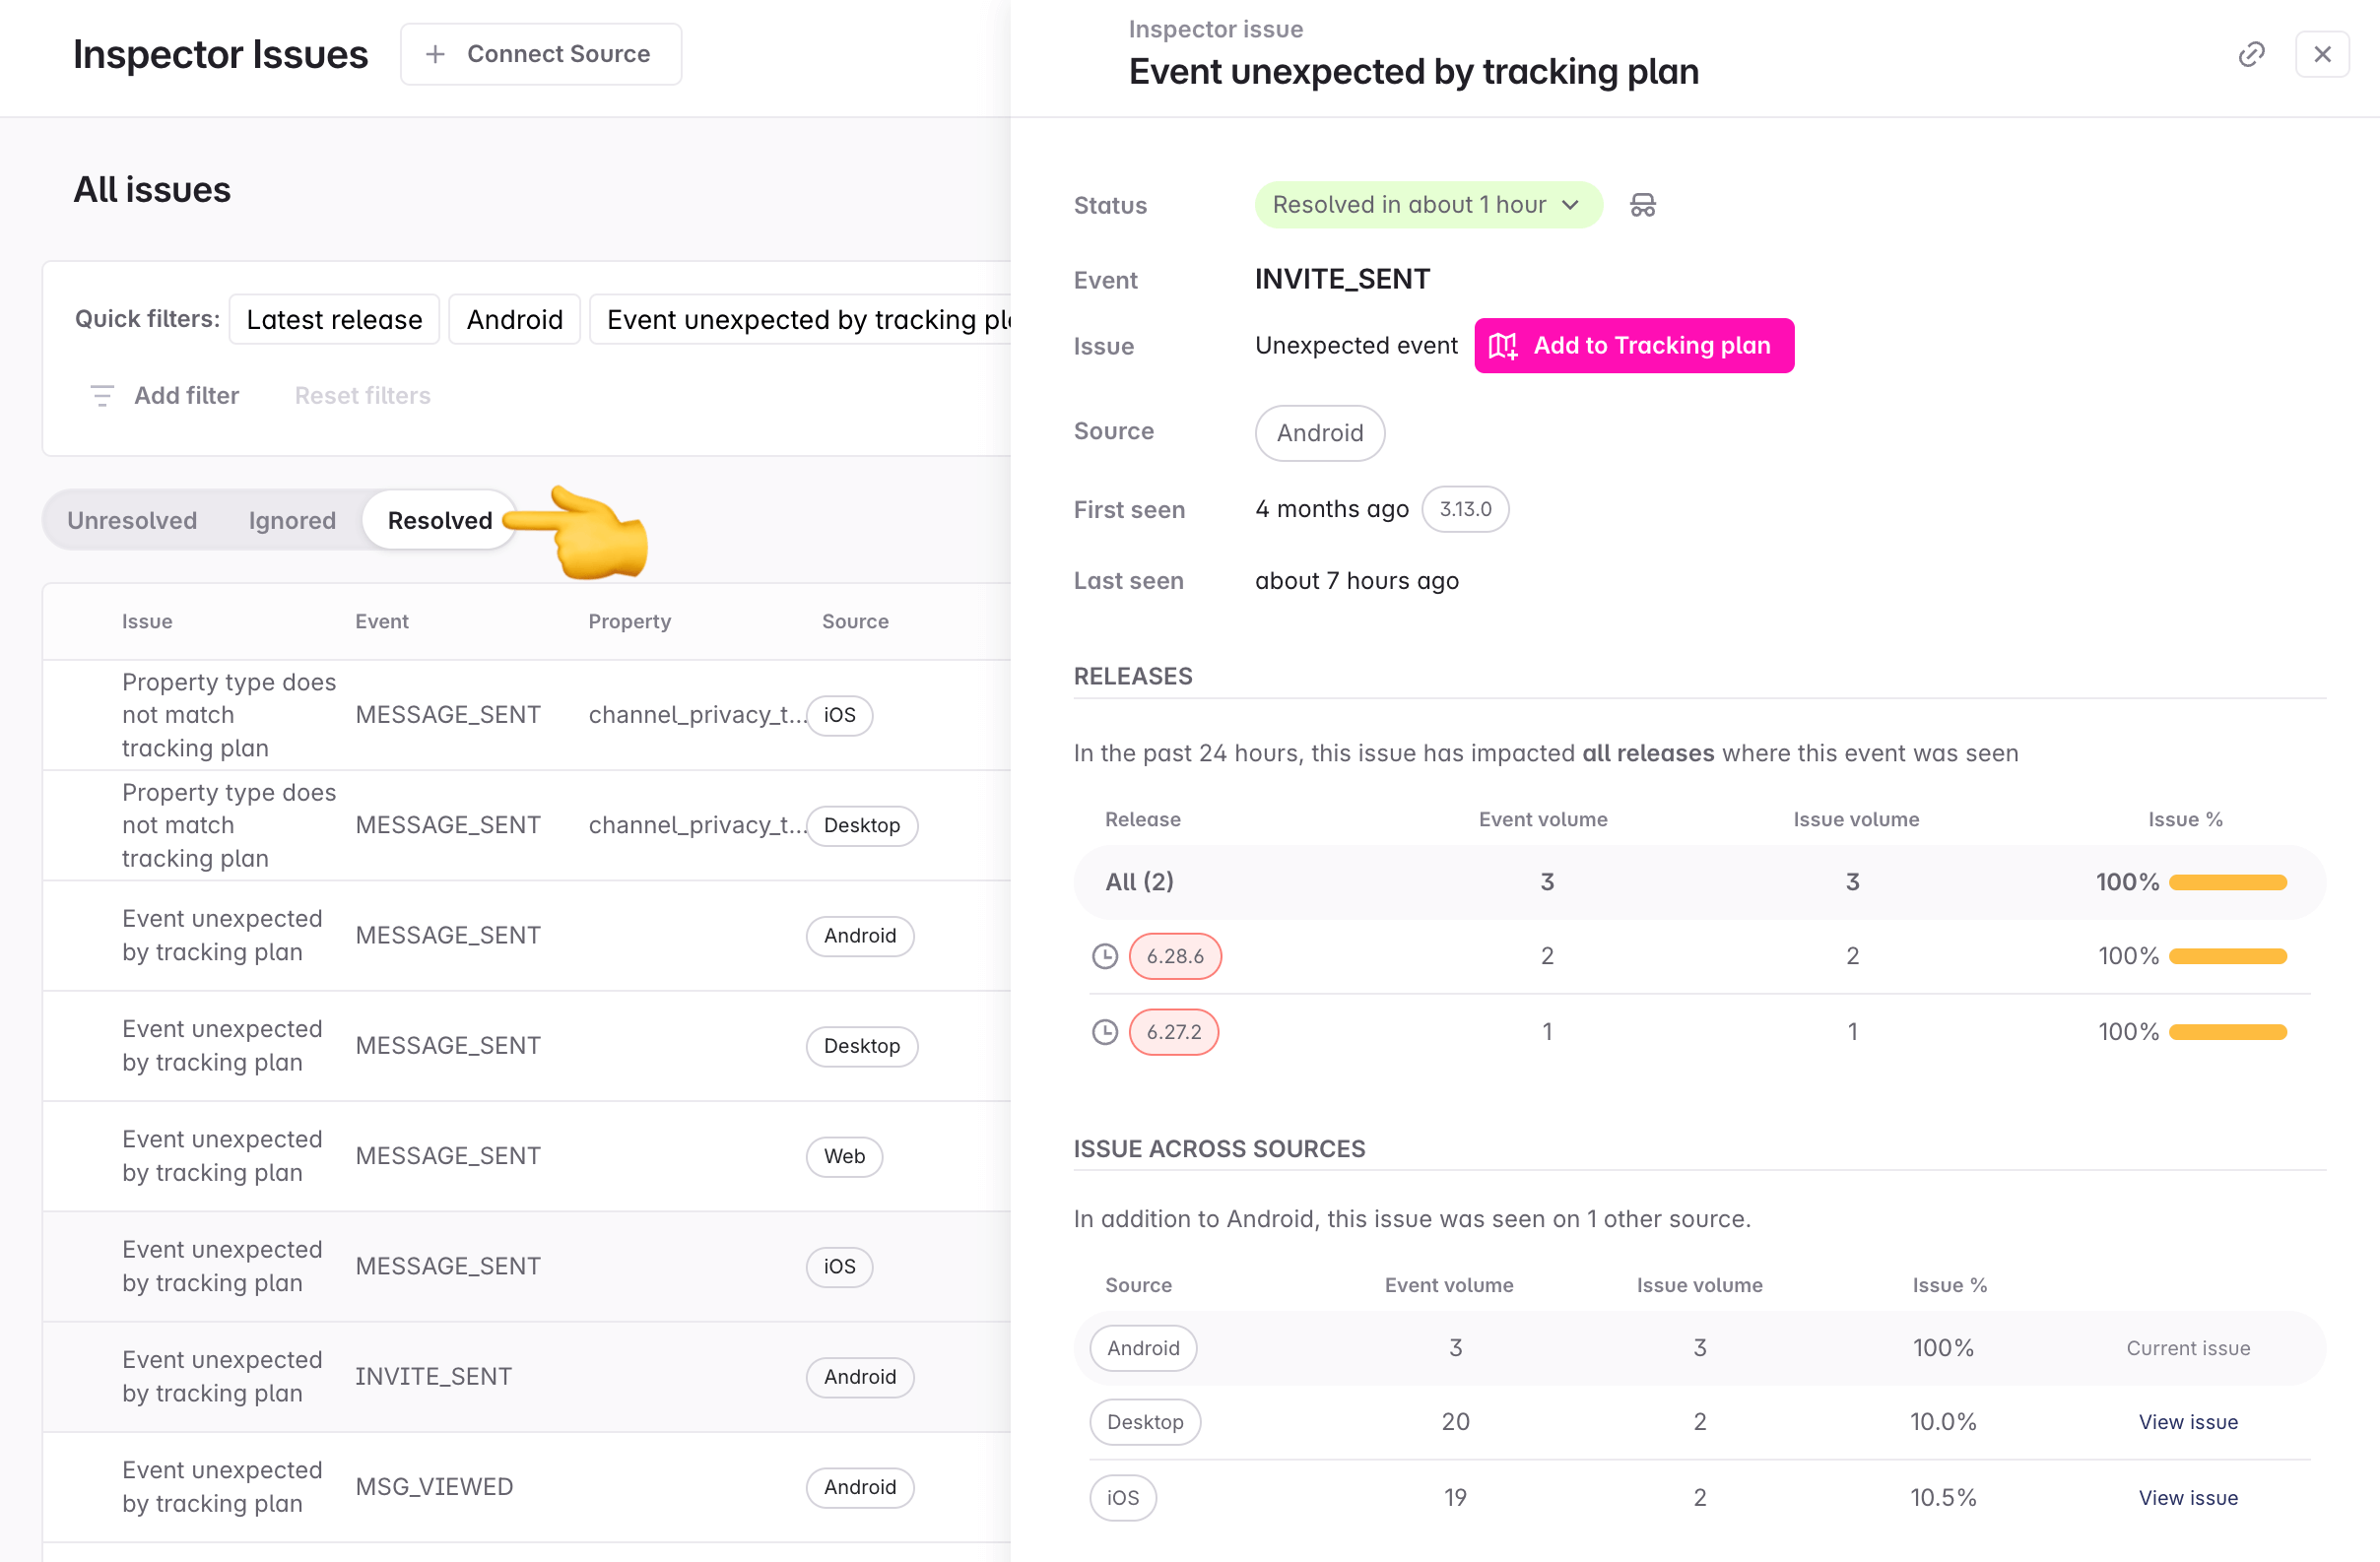
If the issue is that the event or property is unexpected by the tracking plan, but it is correctly sent and should be in the tracking plan, you can add it to the tracking plan directly from the issue details.
Event or property already in tracking plan but has an issue
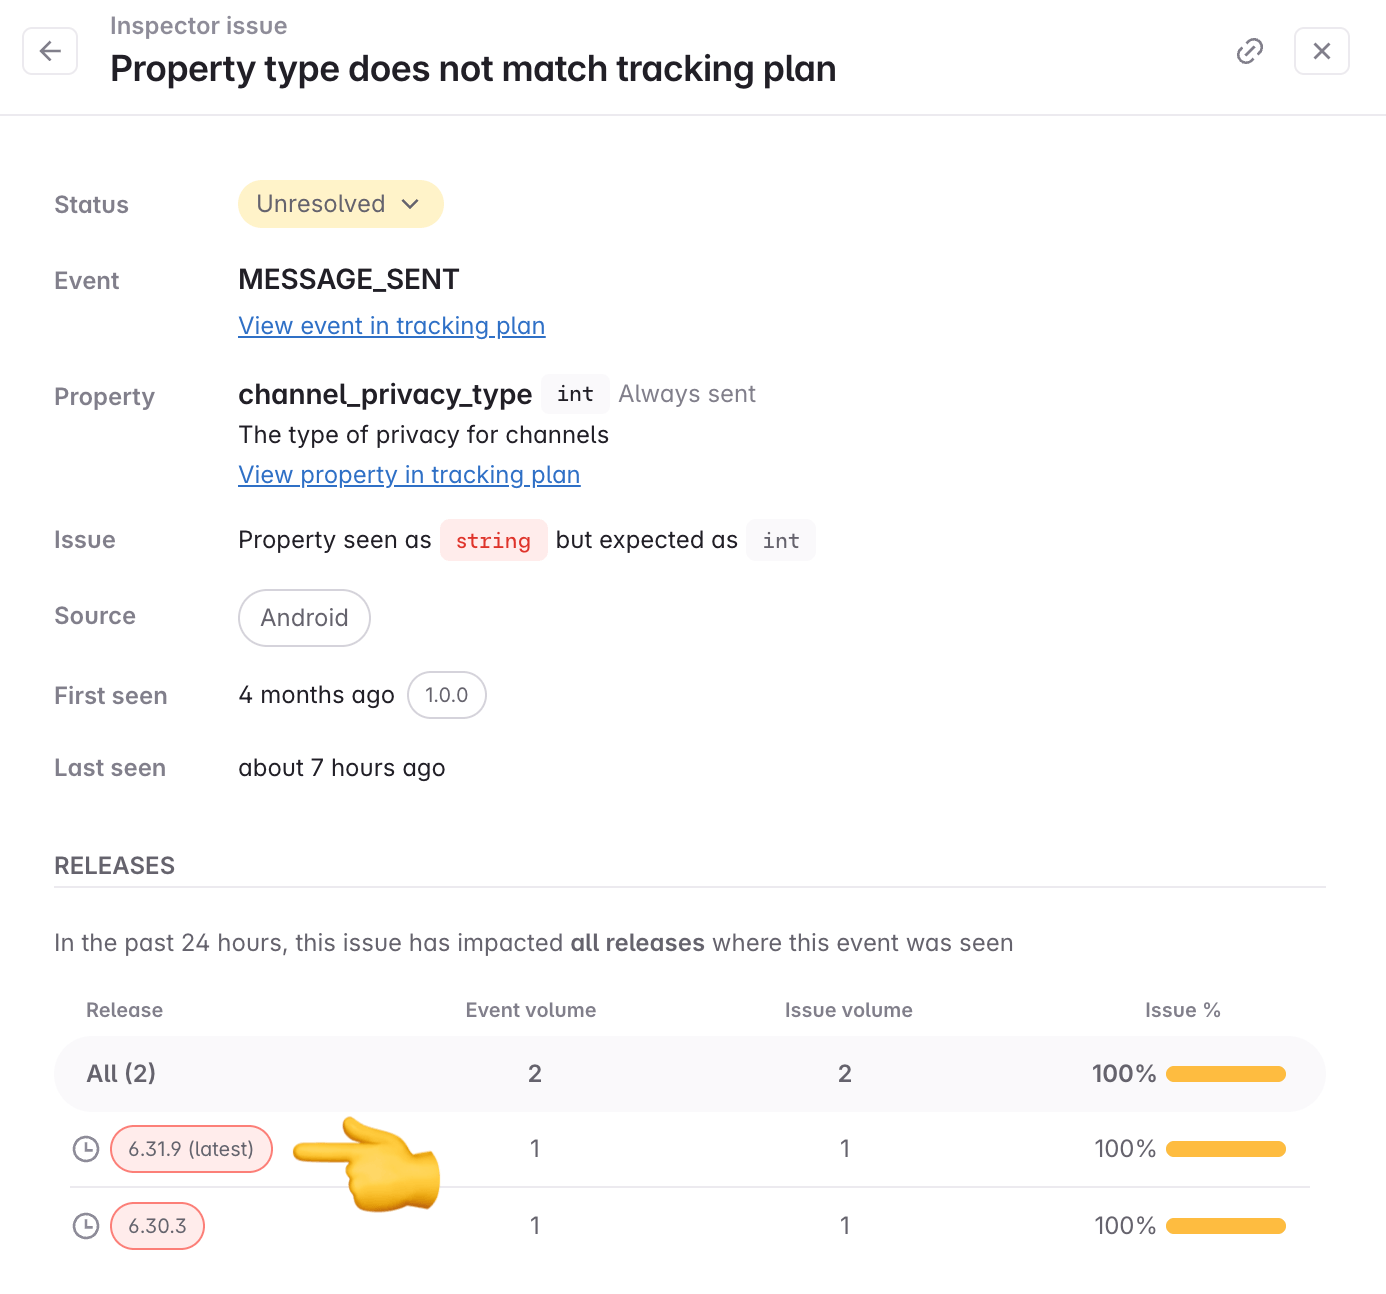
If the issue is on an event or property that is already in the tracking plan, such that the structure of data coming in is correct but the definition in the tracking plan is not correct, then you need to change the definition in the tracking plan. For example the issue can be that the type of the property does not match the tracking plan or the property is unexpected on the event. Then you can navigate to the event or property in the tracking plan and fix the issue.
The issue details has links to the associated event and property in the tracking plan as shown below.
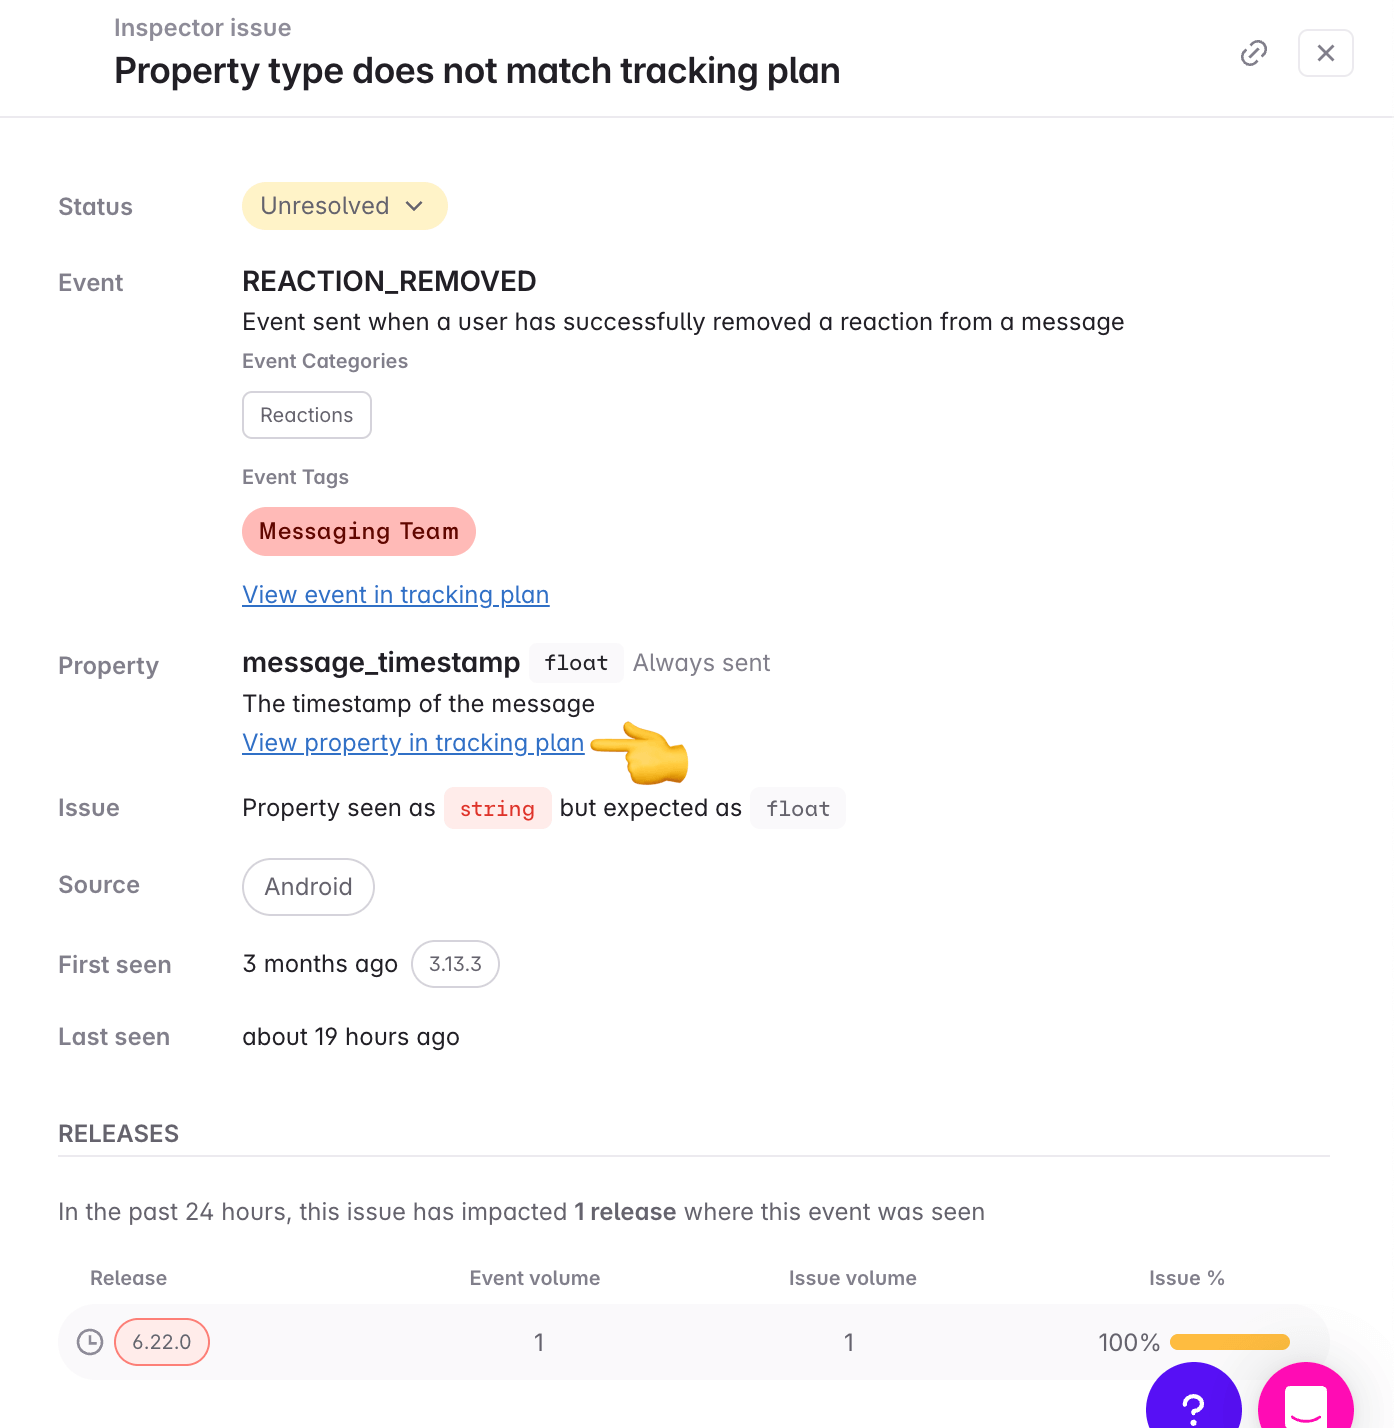
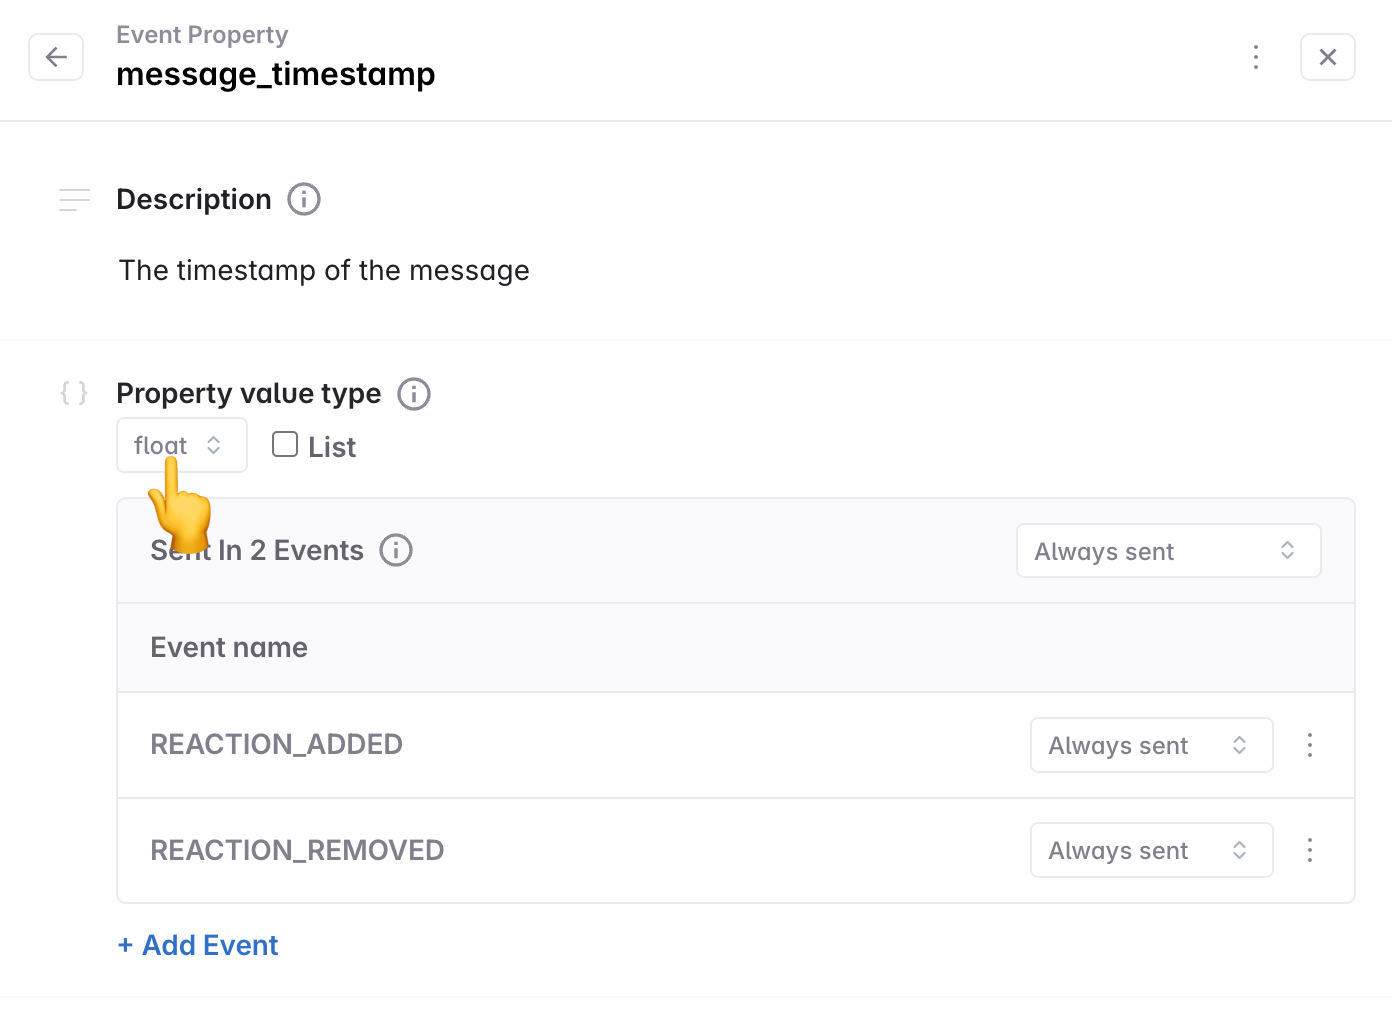
Once you are in the event or property details, fix the issue accordingly. In this example, the type of the property was float in the tracking plan but the data coming in was string. The data coming in is correct and therefore we need to update the property type to string in the tracking plan.
Step 2 - Resolve issue
Once the necessary updates are made in the Tracking Plan, update the issue status to Resolved. See details about resolved issue status below. If the issue reappears, it will be marked as a regression.
If your tracking plan update resolved multiple related issues, you can use bulk actions to resolve them all at once by selecting multiple issues and using the bulk action toolbar.
Resolved issue status
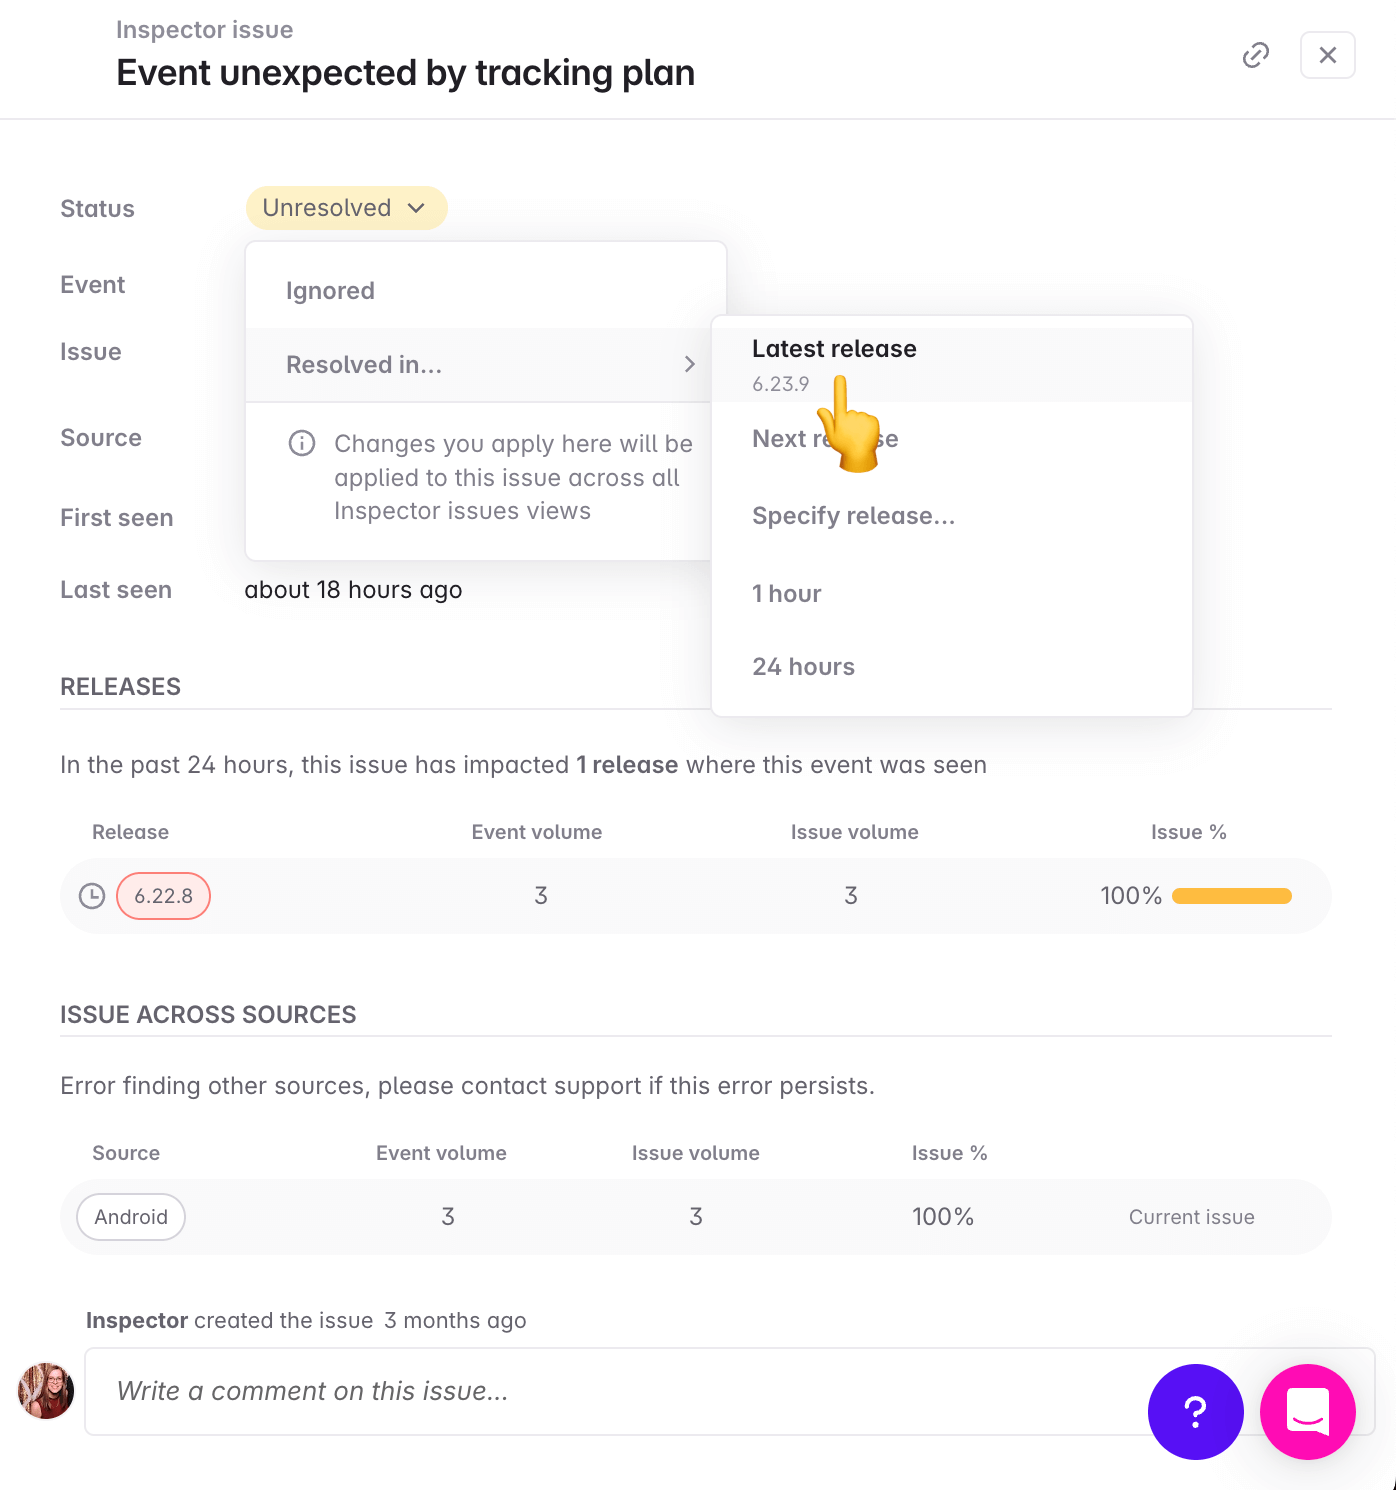
When setting an issue status to Resolved (see available issue statues), you have to specify for what version or what time point the issue should be resolved for.
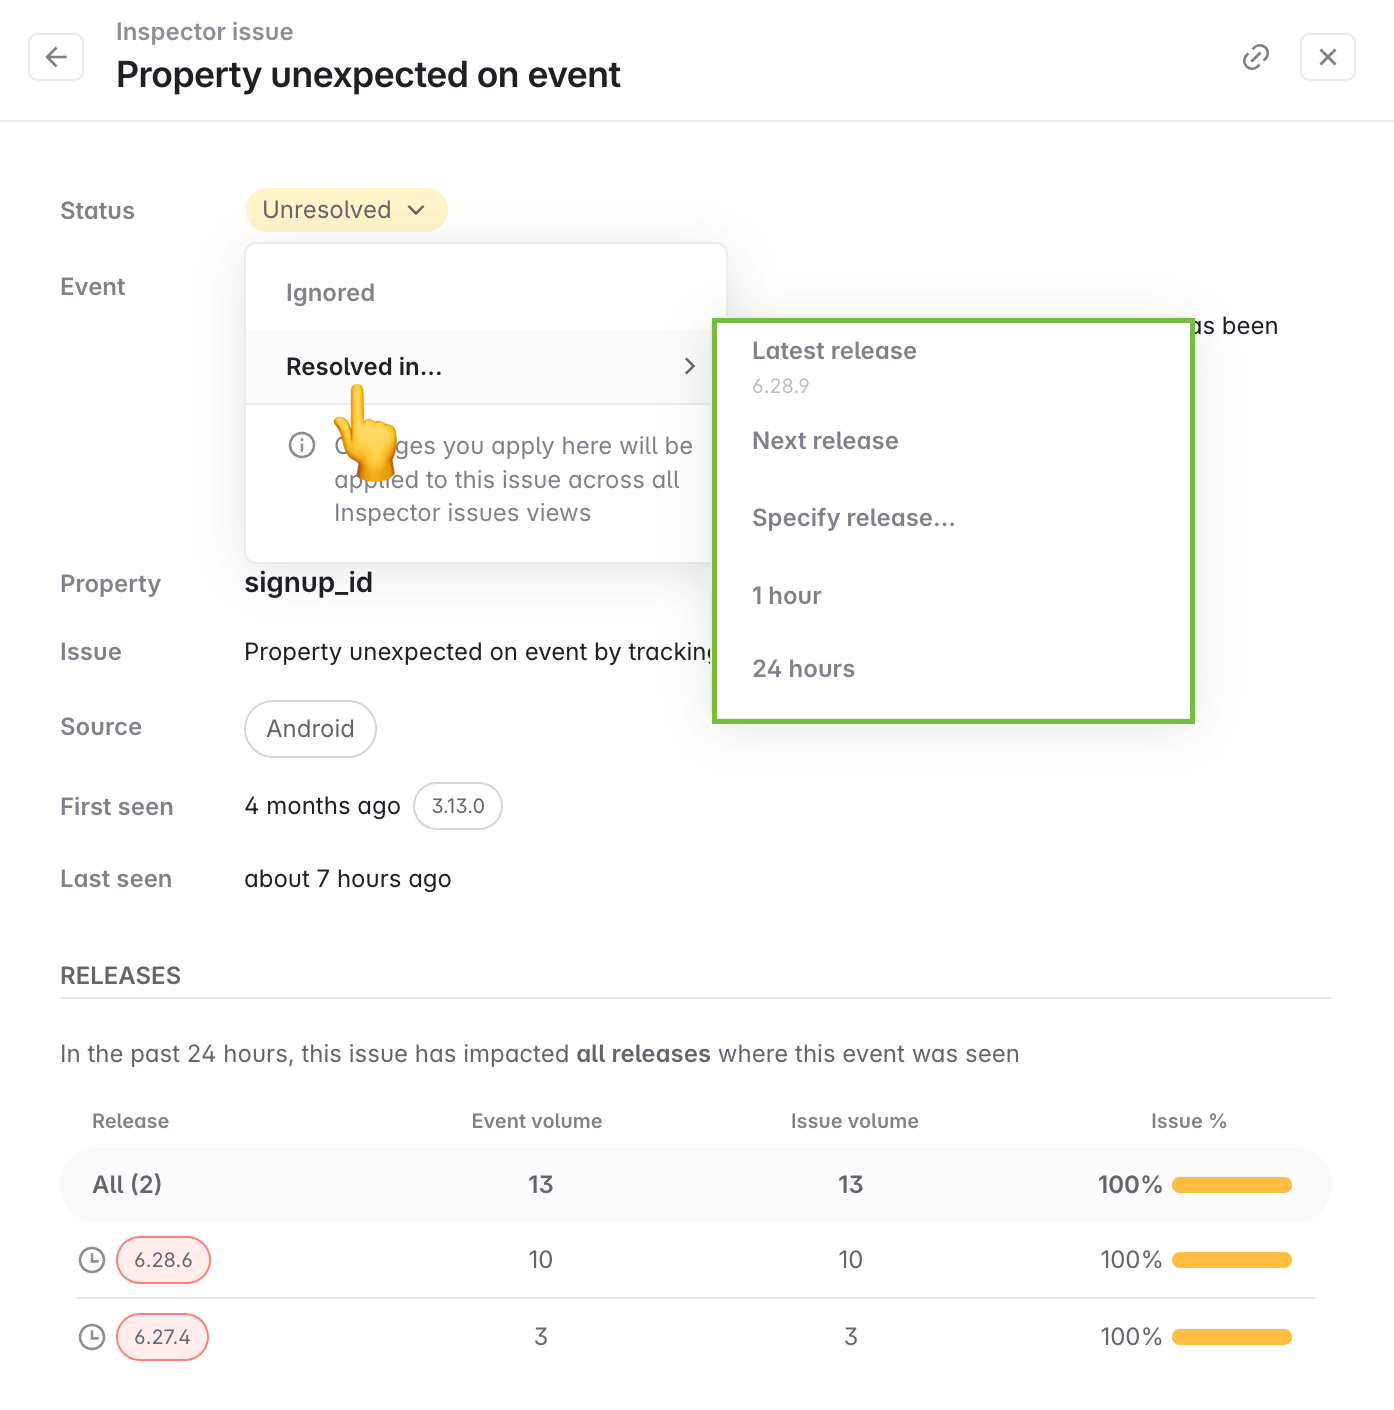
The available options are:
- Latest release: The issue will be resolved for every release version that is lower than the latest version Inspector has seen when the issue is marked as resolved. The latest release version and higher will continue to be validated.
- Next release: The issue will be resolved for the latest release version that Inspector has seen and every lower version that than that. Every release version incremented higher than the latest release version will continue to be validated.
- Specify version: The issue will be resolved for the release version specified and all versions lower than that. Every release version incremented higher than the specified release version will continue to be validated.
- 1 hour: The issue will be resolved for all release versions seen until 1 hour after marking the issue as resolved. Every release version seen after that will continue to be validated.
- 24 hours: The issue will be resolved for all release versions seen until 24 hours after marking the issue as resolved. Every release version seen after that will continue to be validated.
When an issue is marked as resolved, it will immediately be moved to the Resolved section of the issues view.
If the issue reappears, that is it happens in a release version that is incremented higher than the version selected or after the time point selected, then the issue moves back to unresolved marked as a regression.
What’s next
Now that you have started fixing issues, we recommend using Avo to plan your next feature release.
