Finding Inspector issues
To find issues that are relevant and/or important to you and your team, you can use filtering to narrow down the issues you want to see and sorting to see them in an order that is helpful to you. Once you have sorted and filtered, you can save that view and set up alerts for when new issues fit the criteria of your view.
If you have not yet installed Inspector, check out the Inspector installation overview.
Sorting and filtering
The issue table can be sorted by any column. Sort by event volume, issue volume or issue percentage to quickly uncover which issues have the most impact on your data and prioritize accordingly.
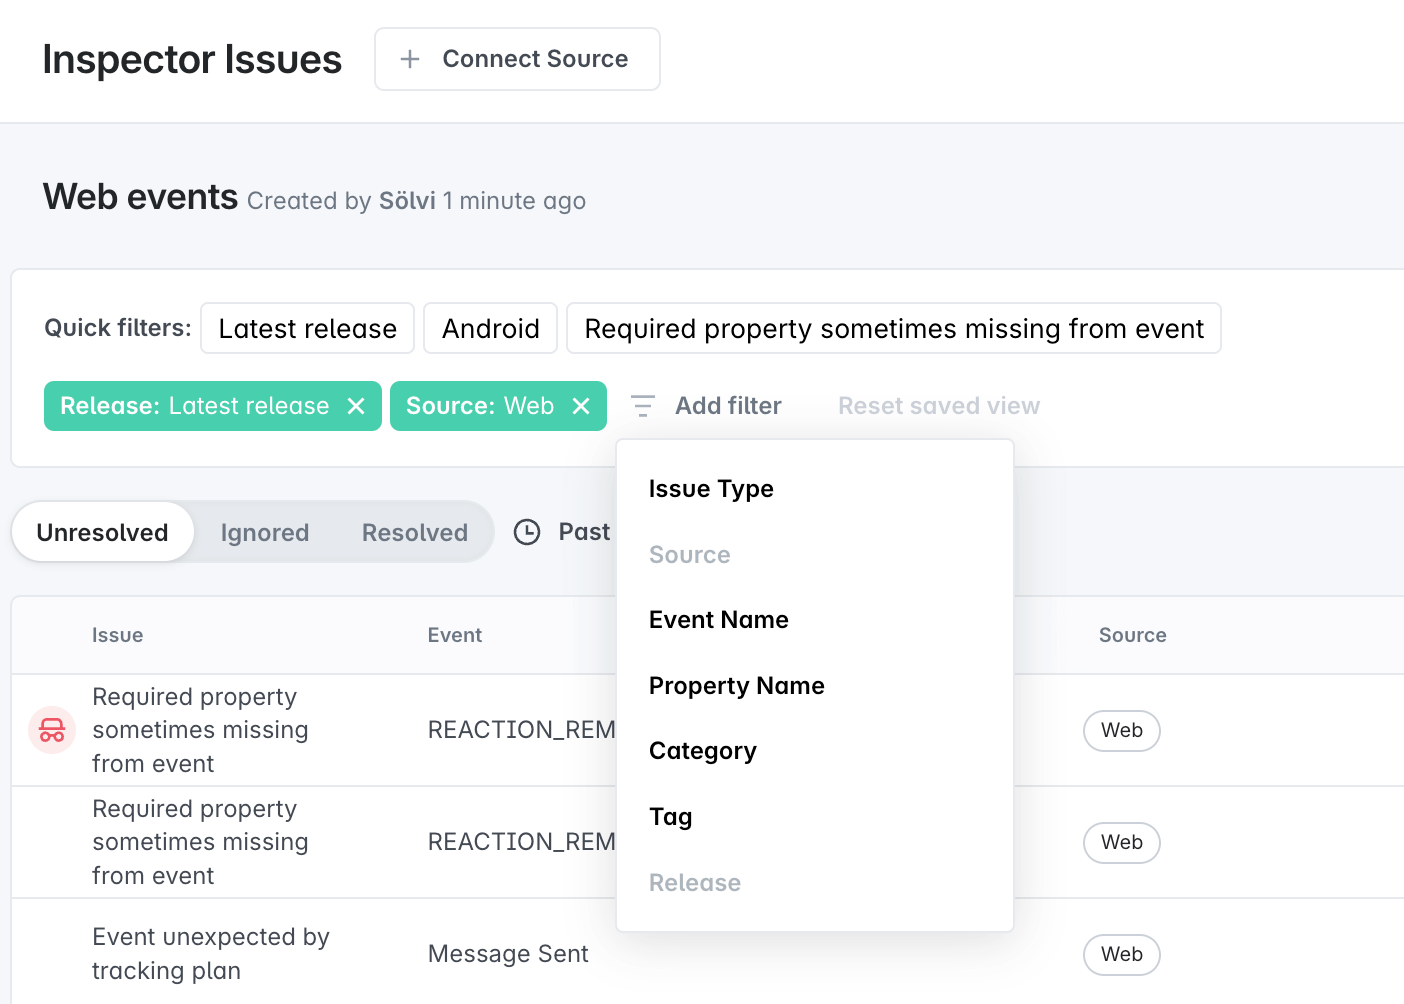
To narrow down your search to your most relevant issues, you can filter by the following:
- Issue Type: The Inspector Issue Type
- Source: The source where the issue was seen
- Event: The event impacted by the issue
- Property: The property impacted by the issue
- Category: The category of the event impacted by the issue
- Tag: The tag of the event impacted by the issue
- Owner: The owner of the event impacted by the issue (all event variant owners included)
- Stakeholder: The stakeholder of the event impacted by the issue (all event variant stakeholders included)
- Release: The product release version impacted by the issue. Currently there are three release filters available:
- Latest release: The latest product release version seen on each of your sources
- Two latest releases: The two latest product release versions seen on each of your sources. This option can be helpful if the latest release is not yet fully rolled out.
- Three latest releases: The three latest product release versions seen on each of your sources. This option can be helpful if the two latest release are not yet fully rolled out.
In addition, you can view issues that have been marked as resolved or ignored. The unresolved and ignored views show you info from the past 24 hours but the resolved view contains every issue you have ever marked as resolved and has not regressed.
We are actively working on adding more filter options, and you can expect more filters in the near future. If there’s anything specific you’d like to be able to filter by, please let us know.
Saving a filtered Issues view
Once you have filtered and/or sorted your issues, you can save the filtered view for quick access for you and your team. The saved view persists for both the filters and the sort order you have selected.
Creating a saved view
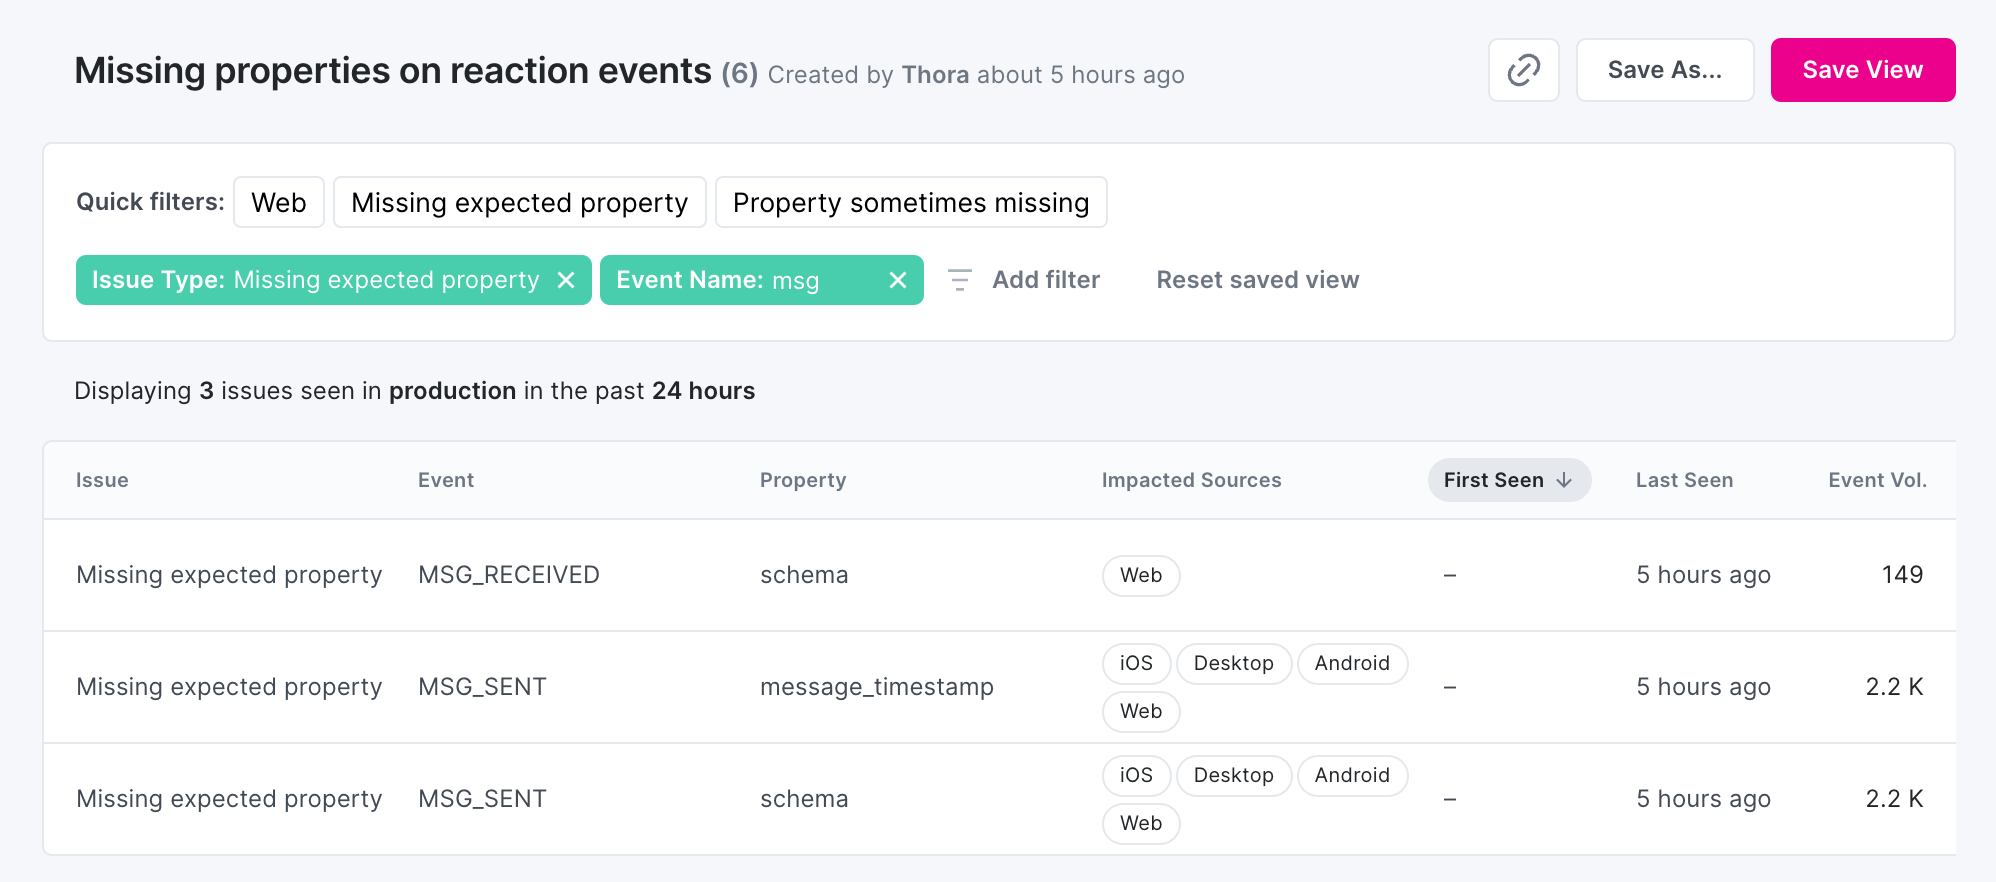
When the issues view is opened, the default view is an unfiltered “All Issues” view ordered by Last Seen, such that the latest issues are on top. The “Save View” button is disabled until at least one filter or a sort order are applied.
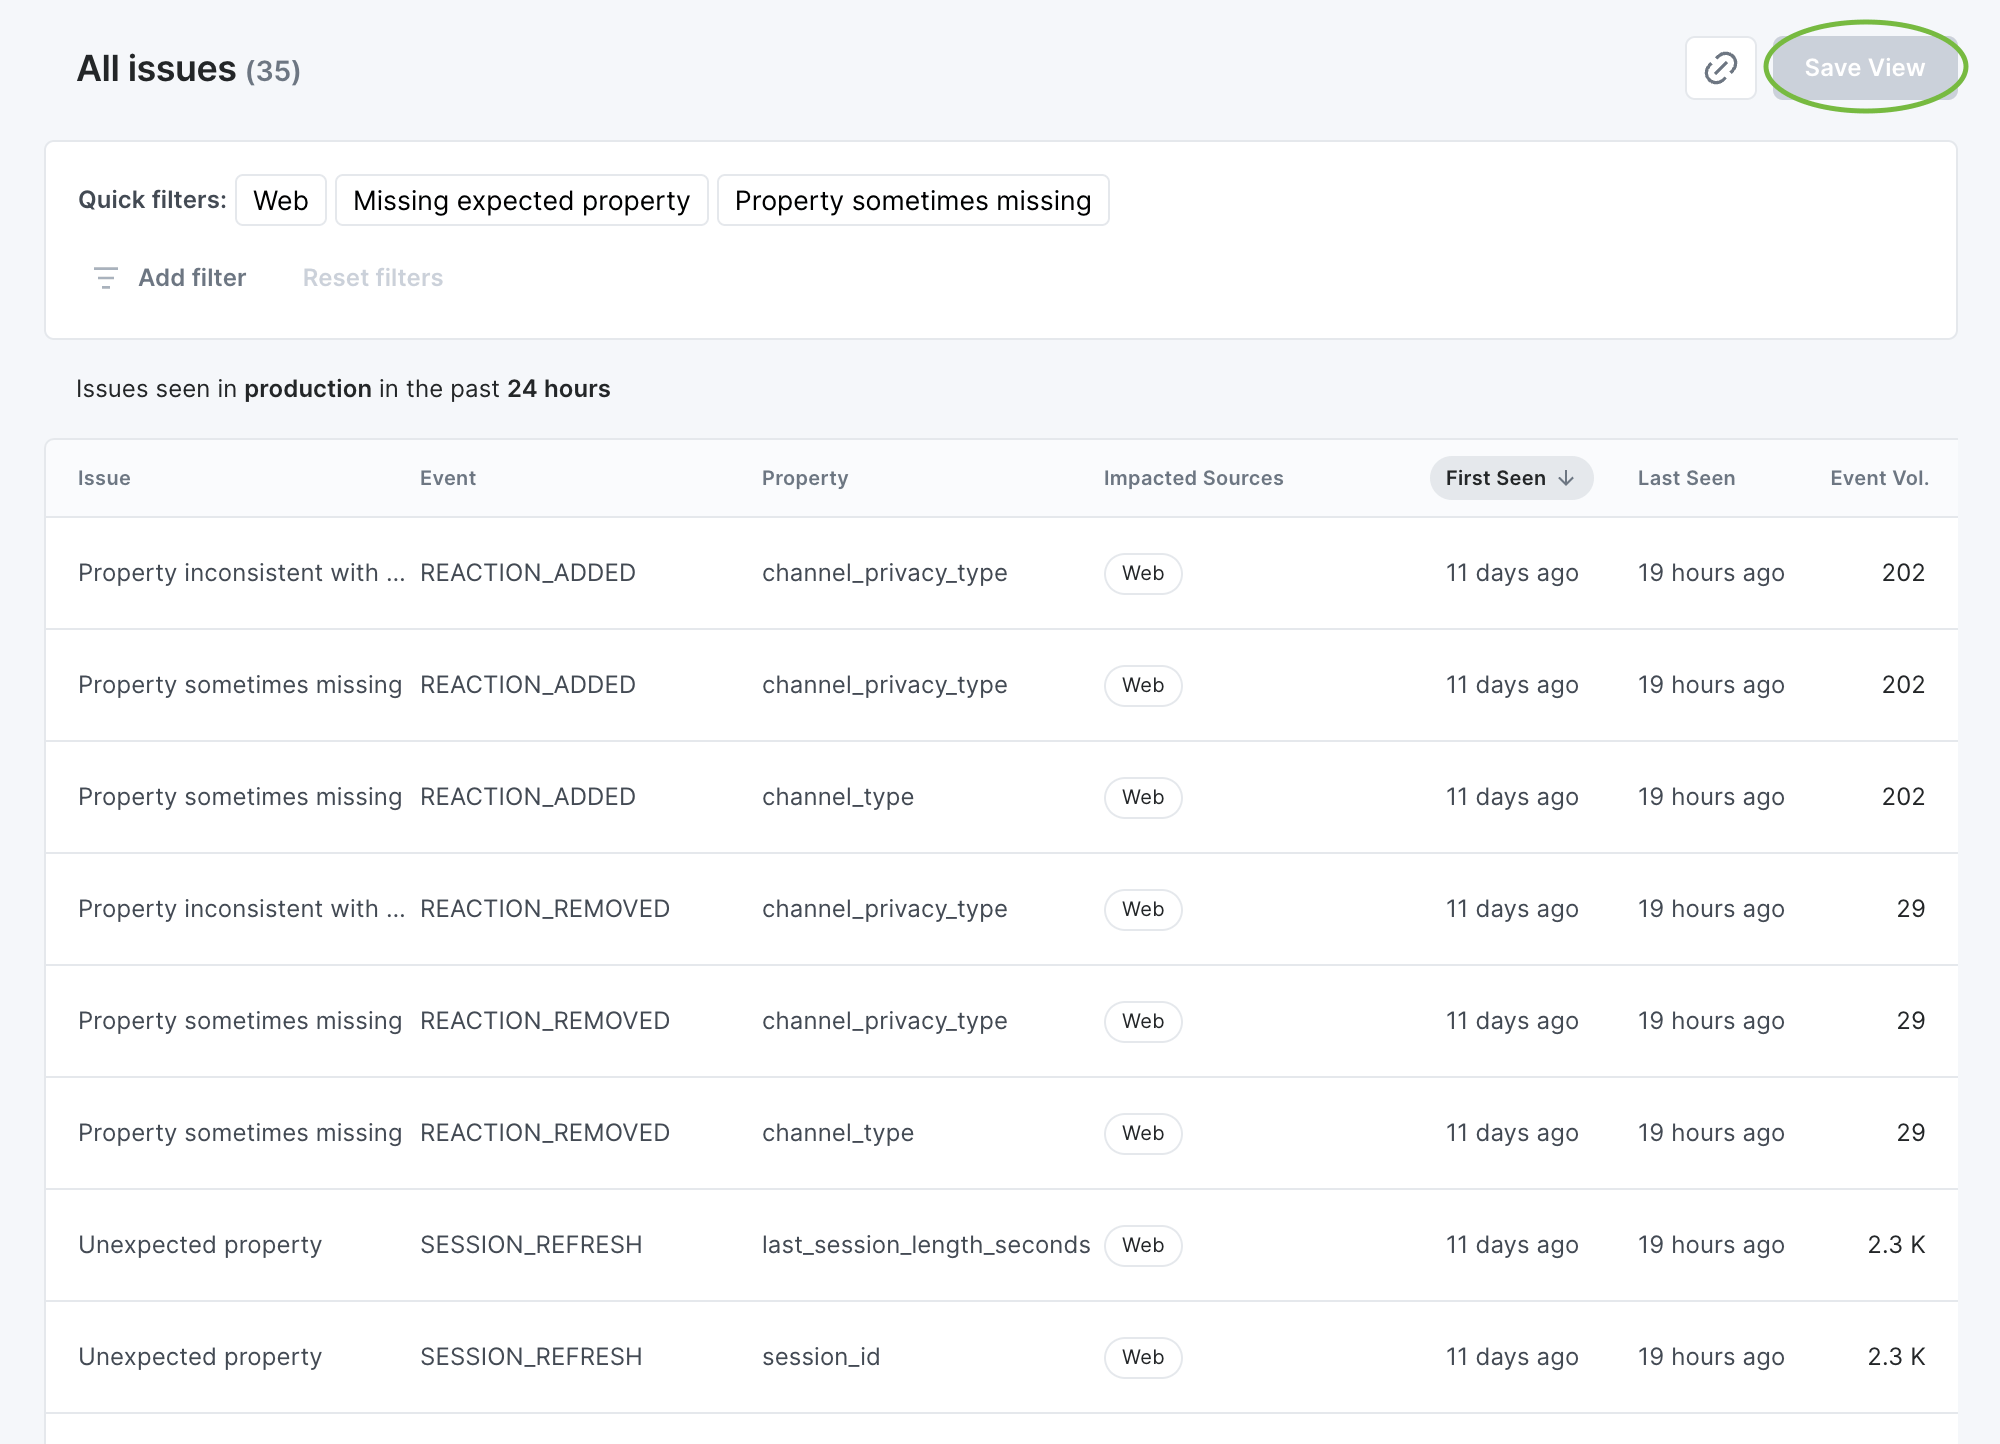
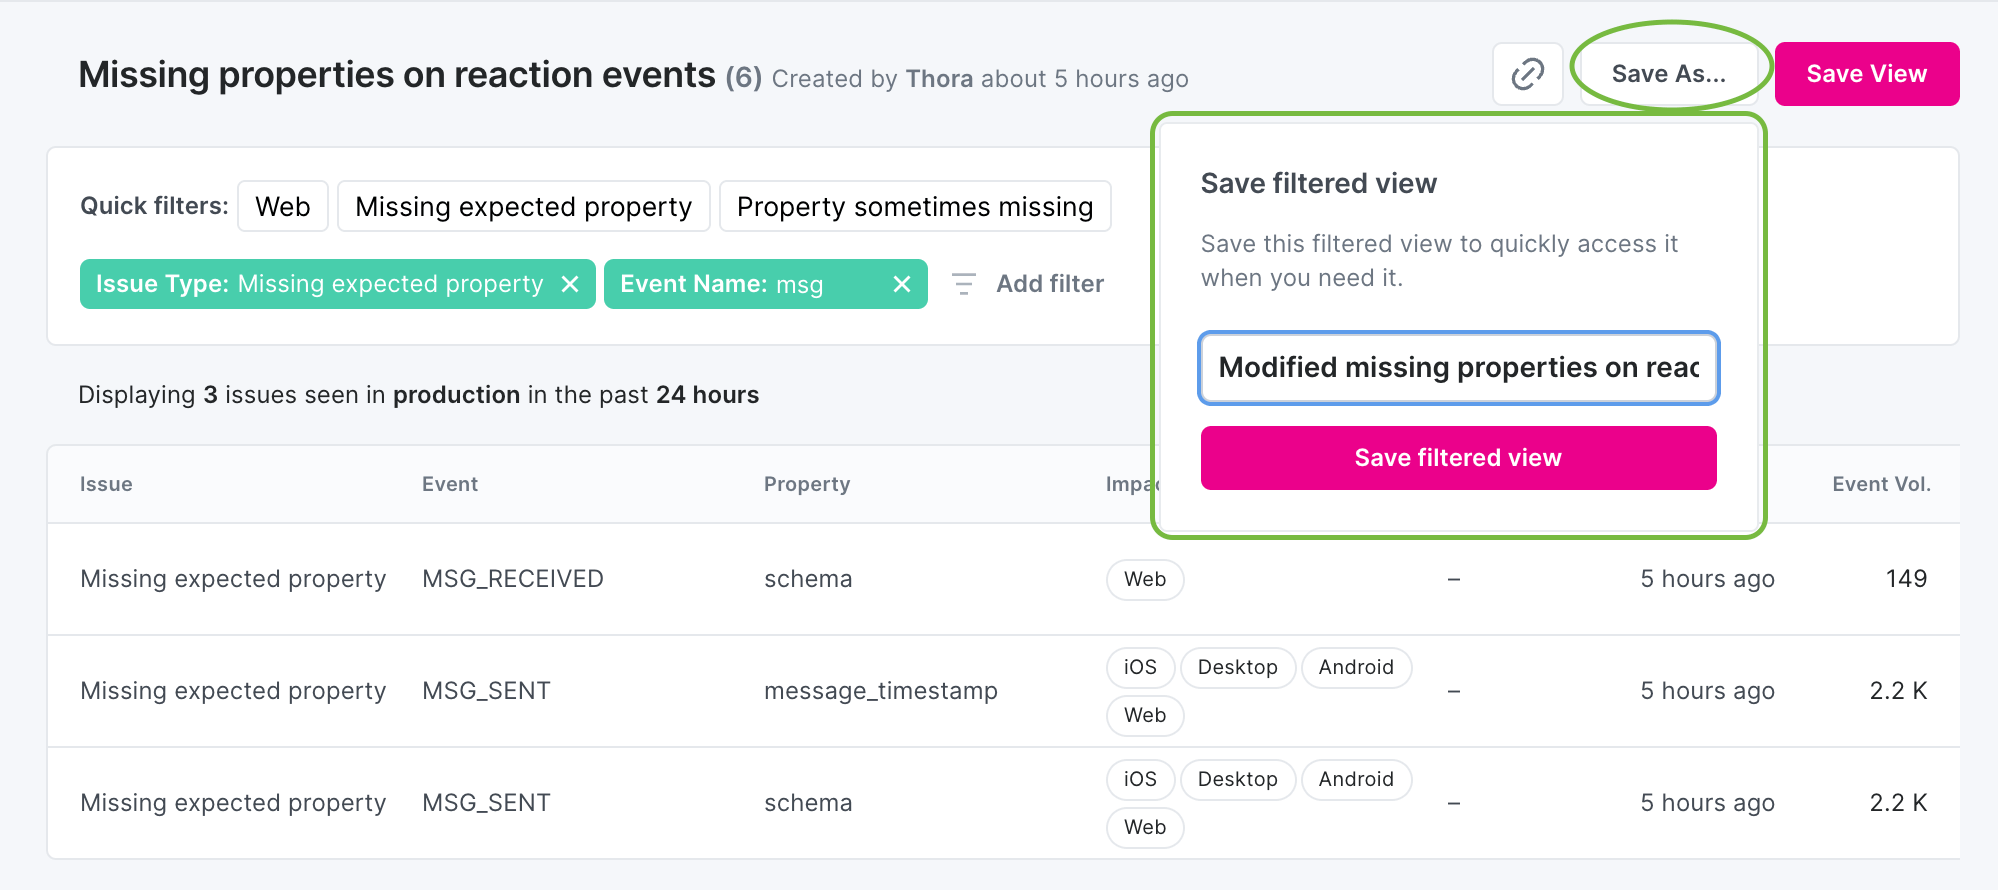
Once a filter is added or the sort order is changed, the “Save View” button is enabled. Click it to name the view and save it.
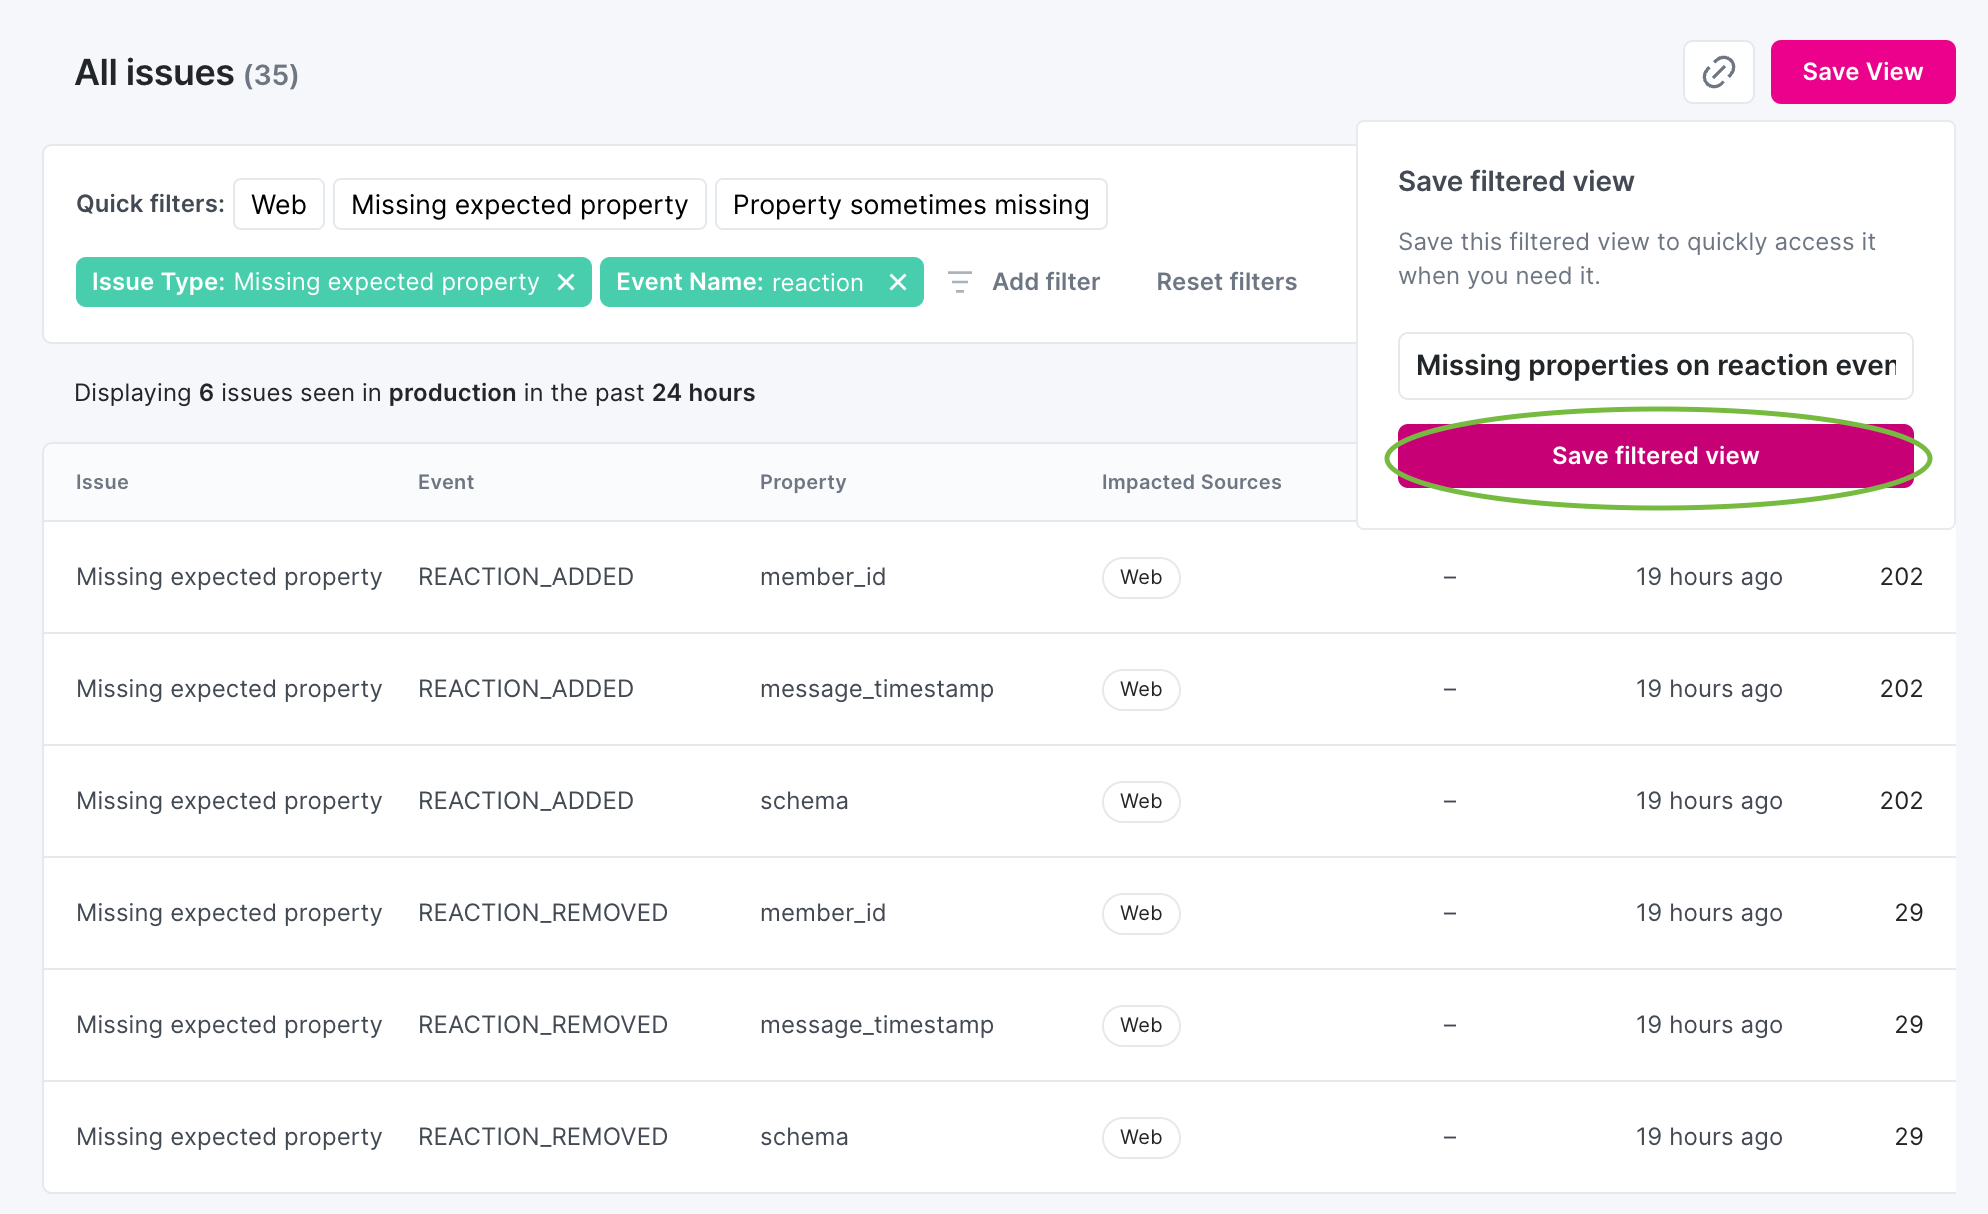
Once the “Save filtered view” button is clicked, the view is successfully saved and it is displayed with its new name.
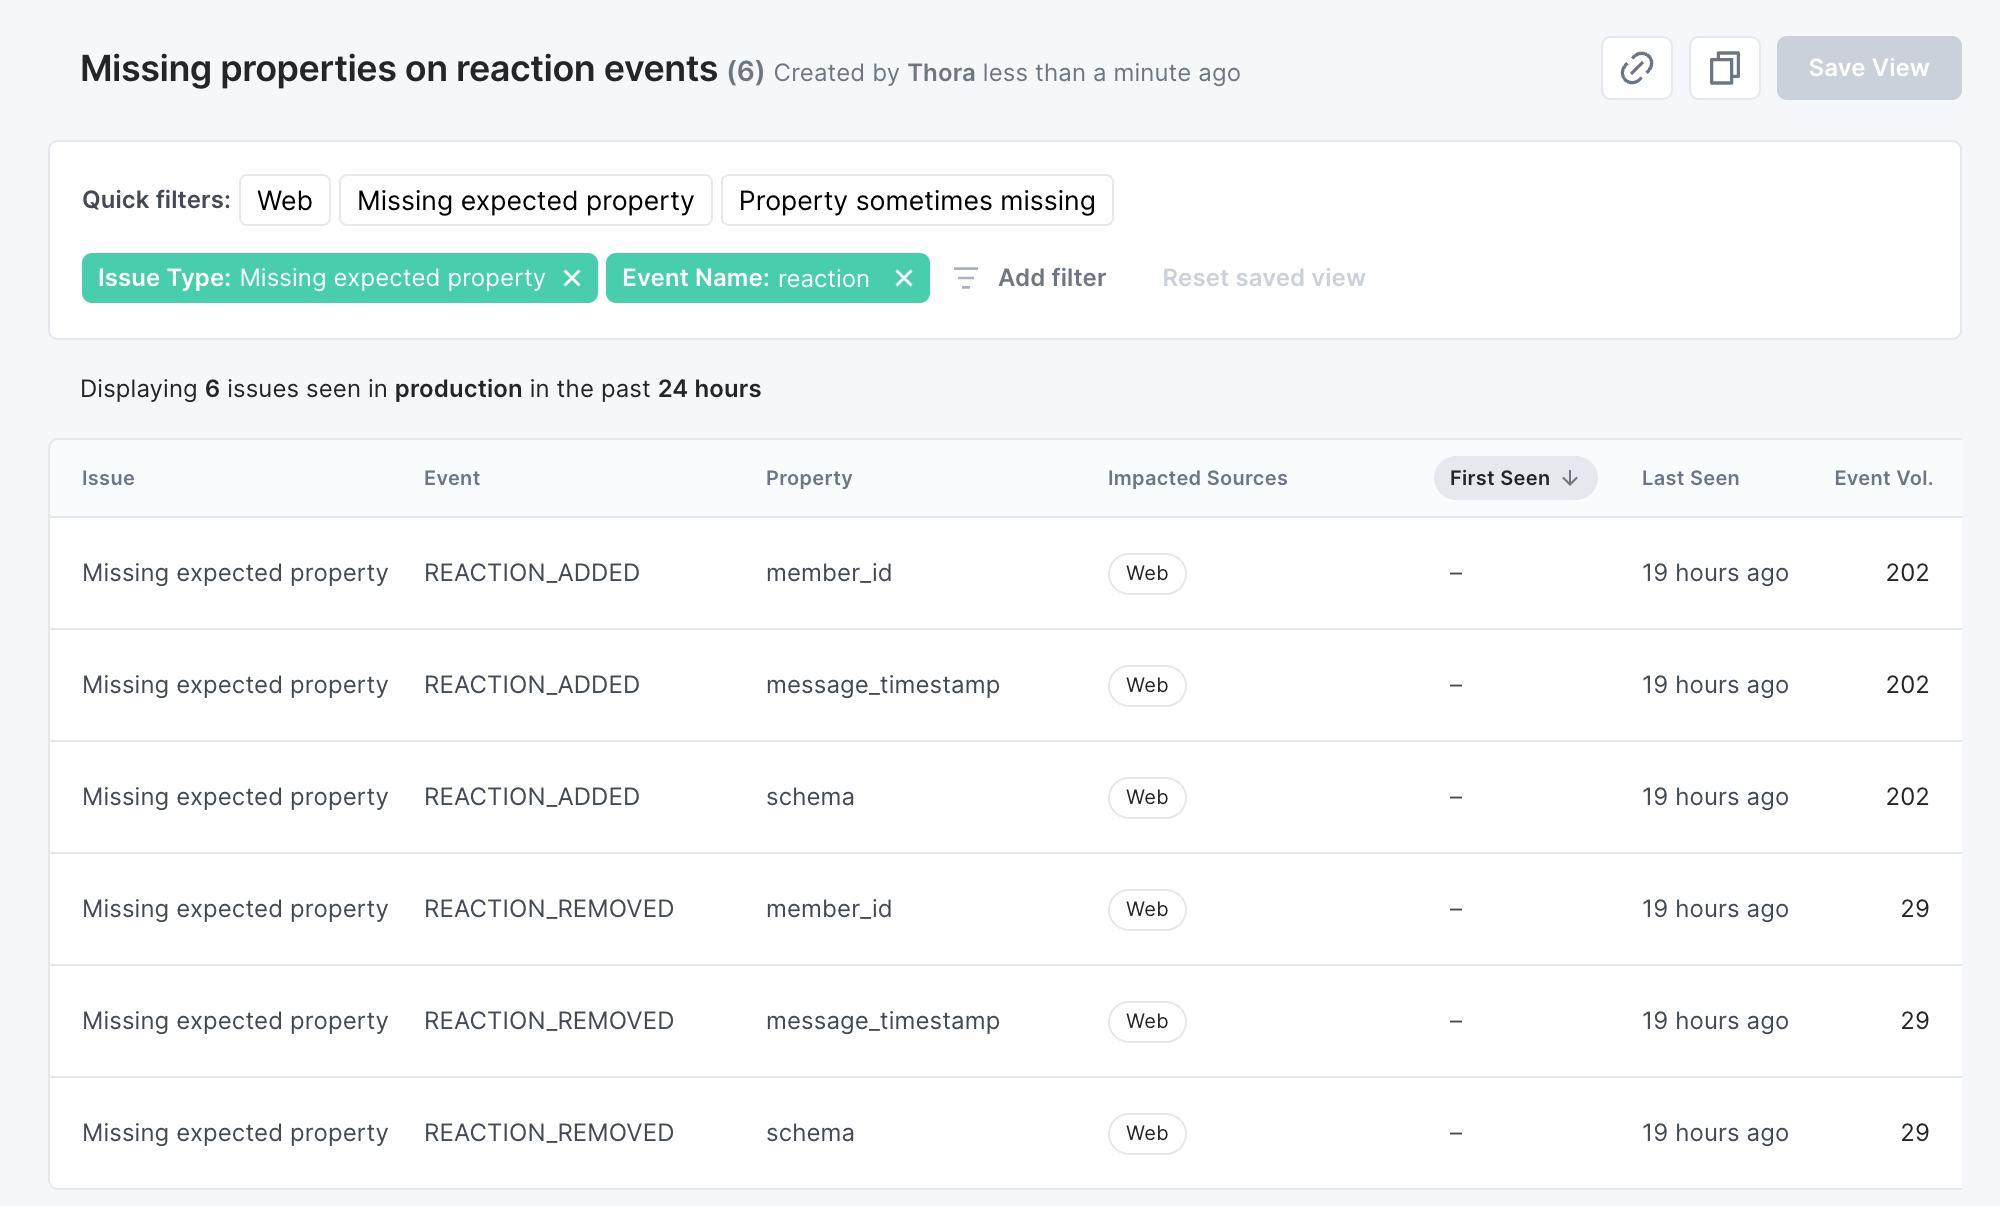
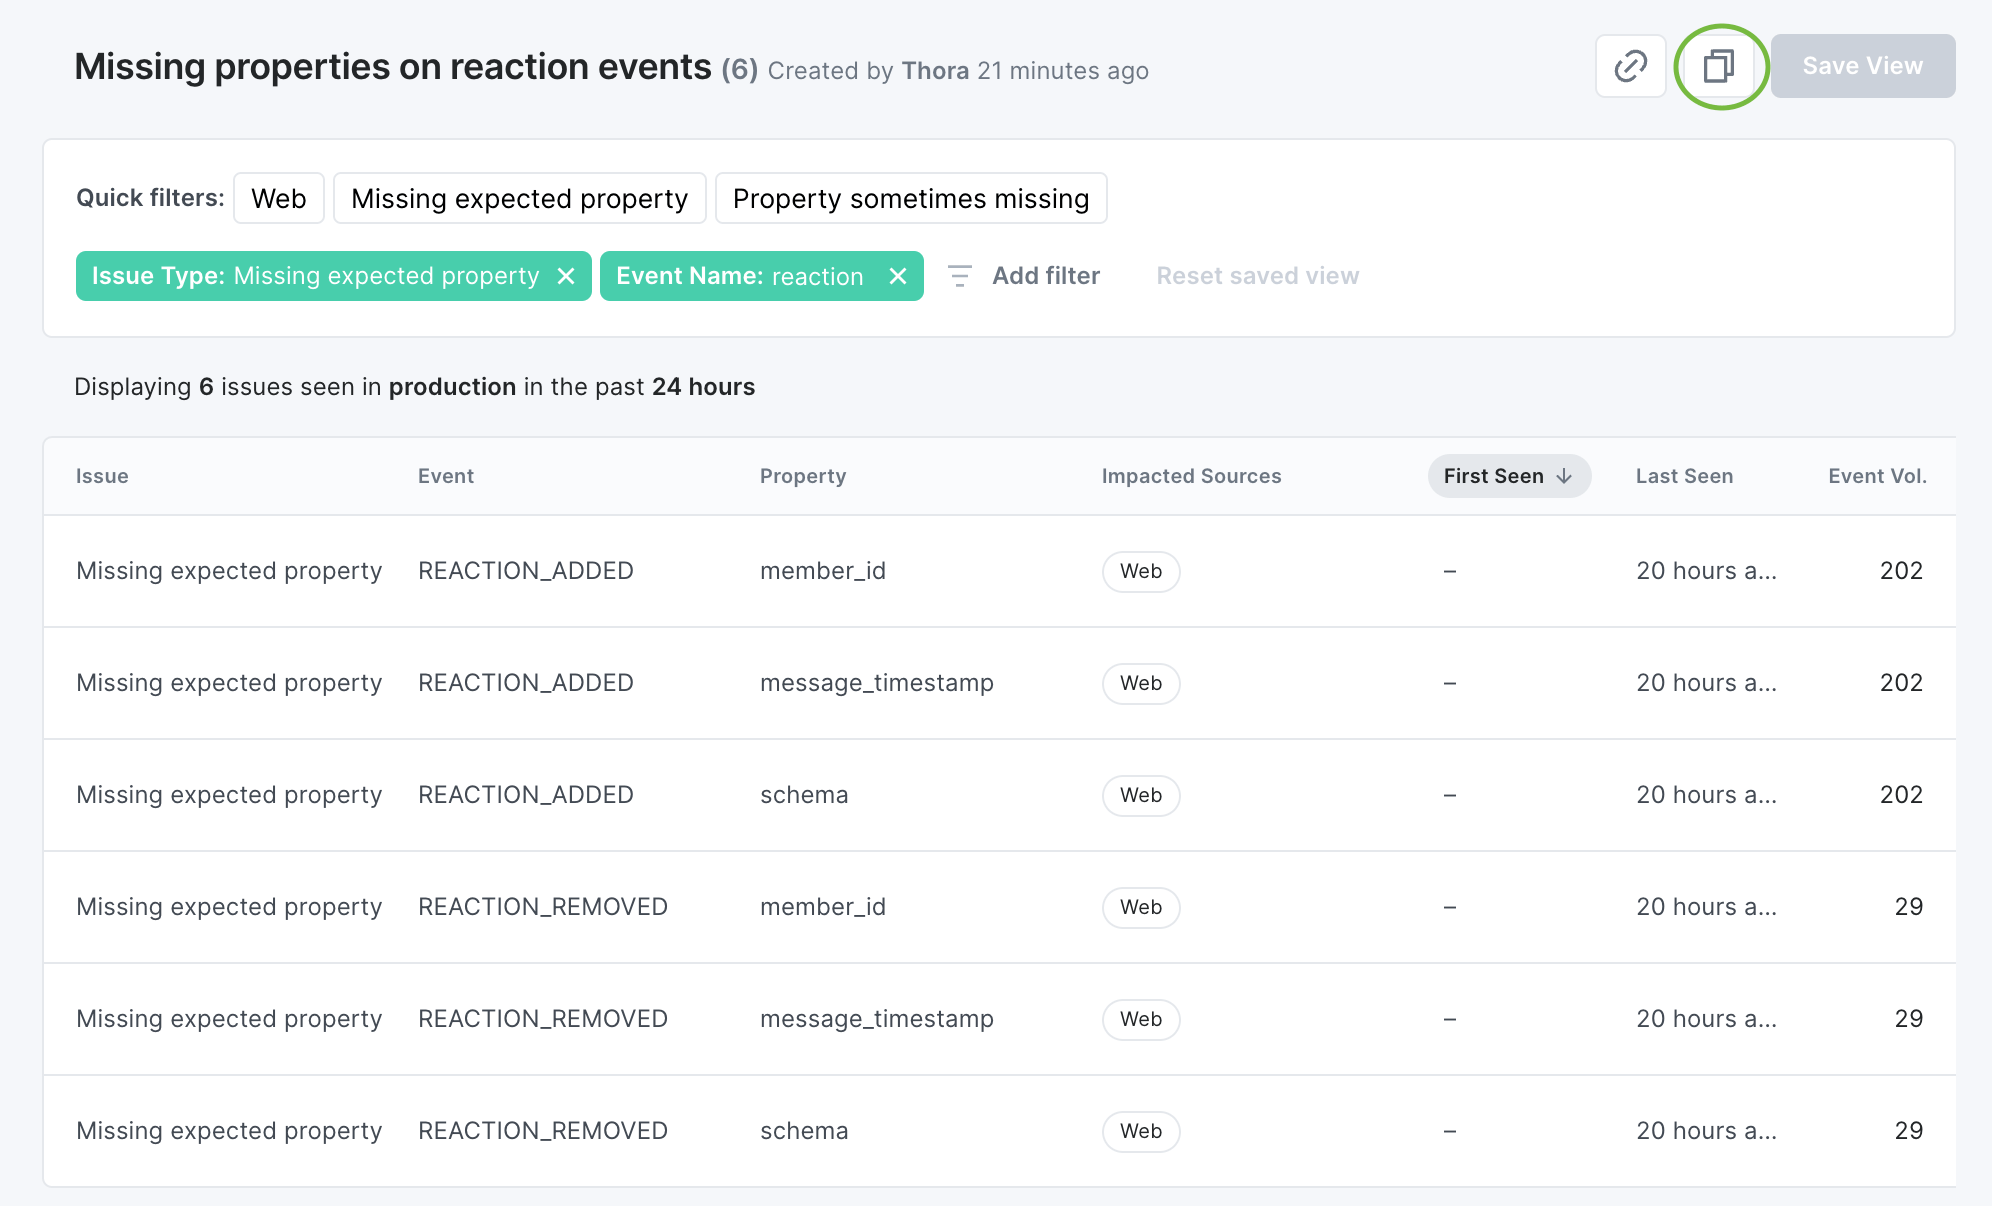
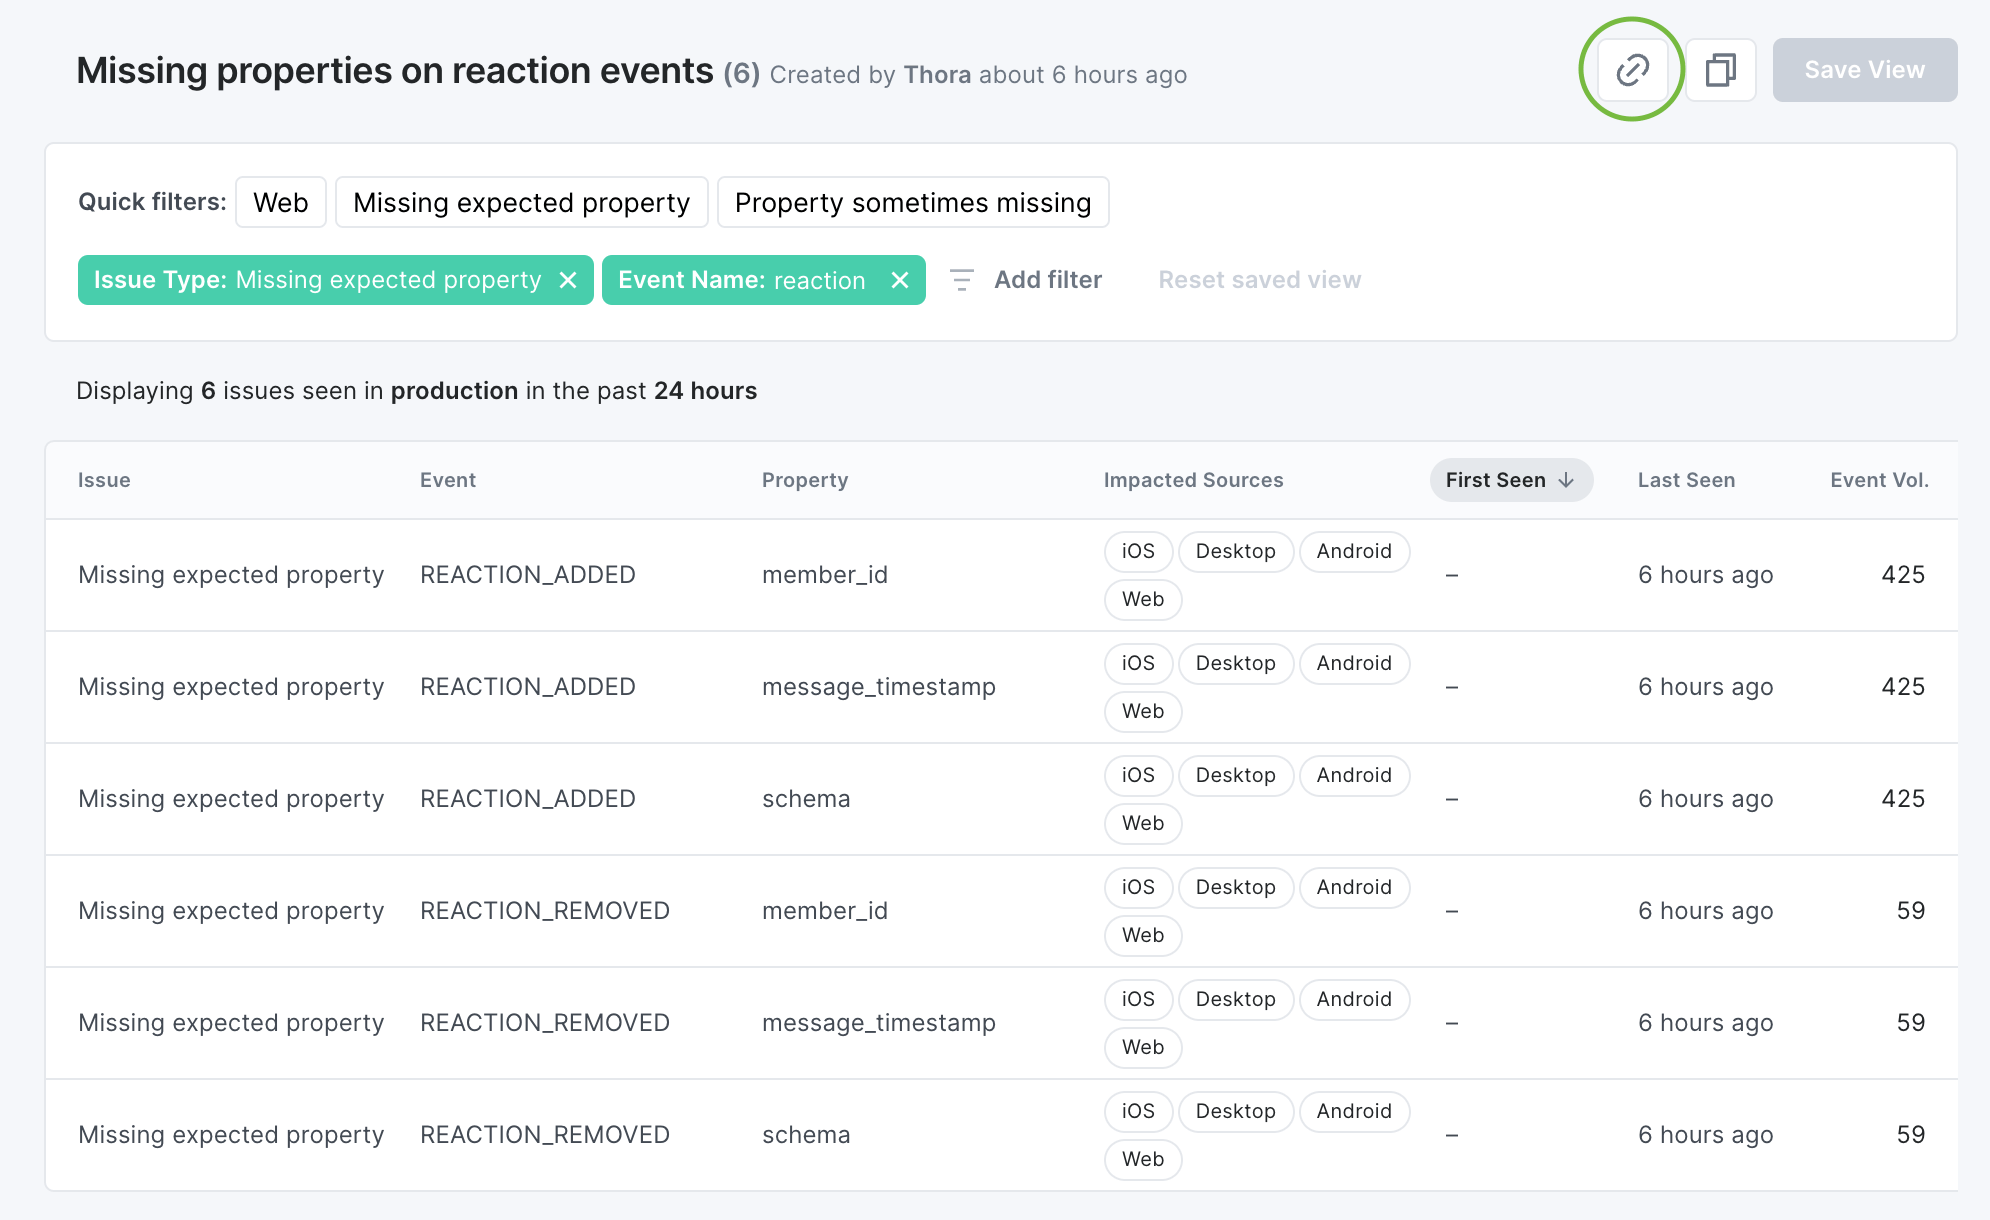
In each saved view, there are buttons to copy the URL to the view and duplicate the view. The “Save View” button is disabled until further changes are made.
Duplicating and modifying a saved view
To create a new view based on another saved view, you can:
- Click the Duplicate button to first duplicate it and then modify it
- Modify an existing saved view and then click the “Save View as…” button to save it as a new view.
Duplicate and modify
To duplicate an existing saved view, click the Duplicate button in the top right corner, next to the “Save View” button.
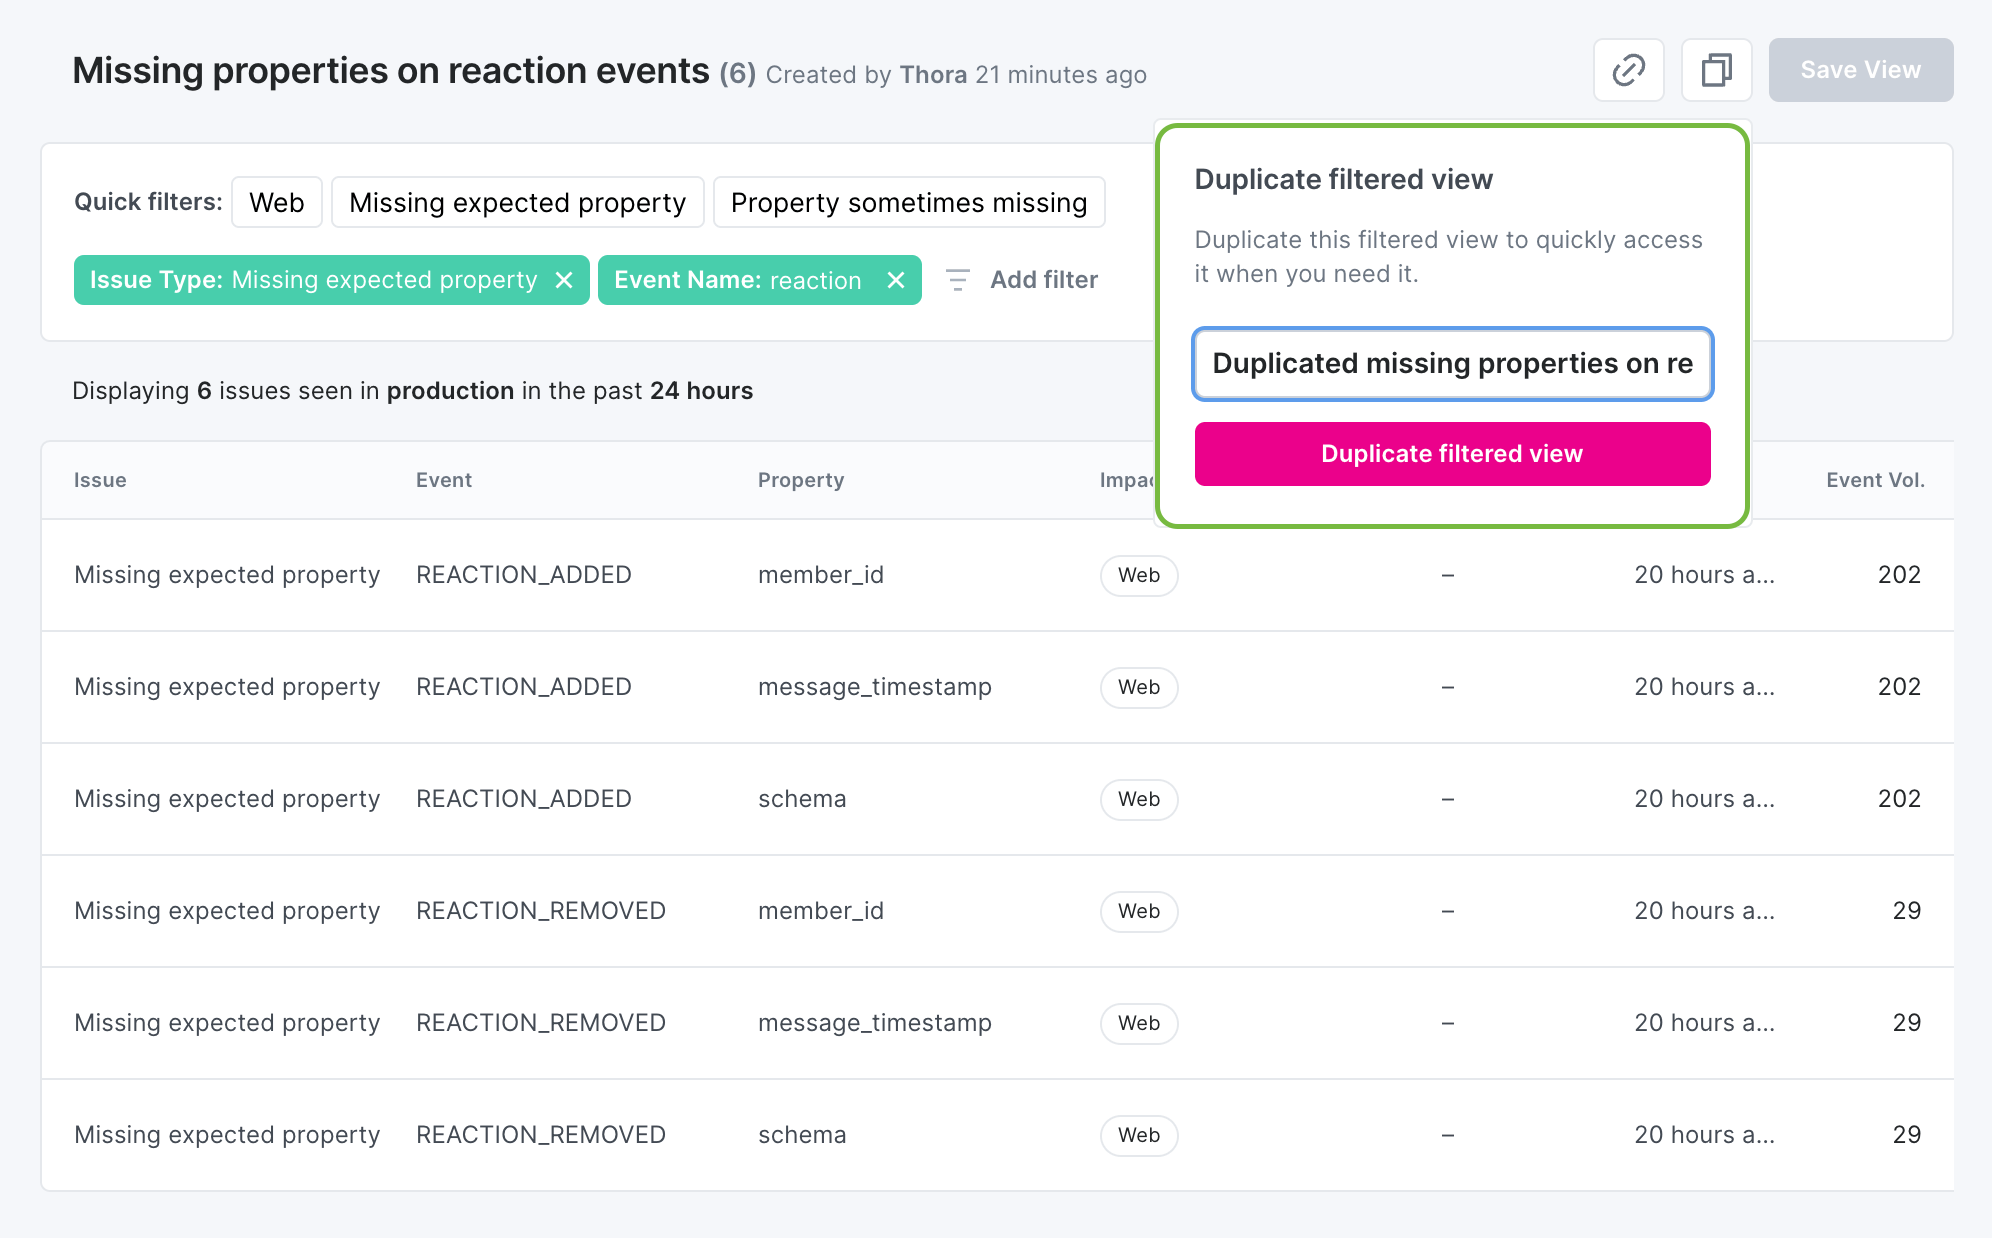
Then input a name for the new duplicated view and click “Duplicate filtered view”.
Once the “Duplicate filtered view” button is clicked, the duplicated view is successfully saved and displayed with the inputted name.
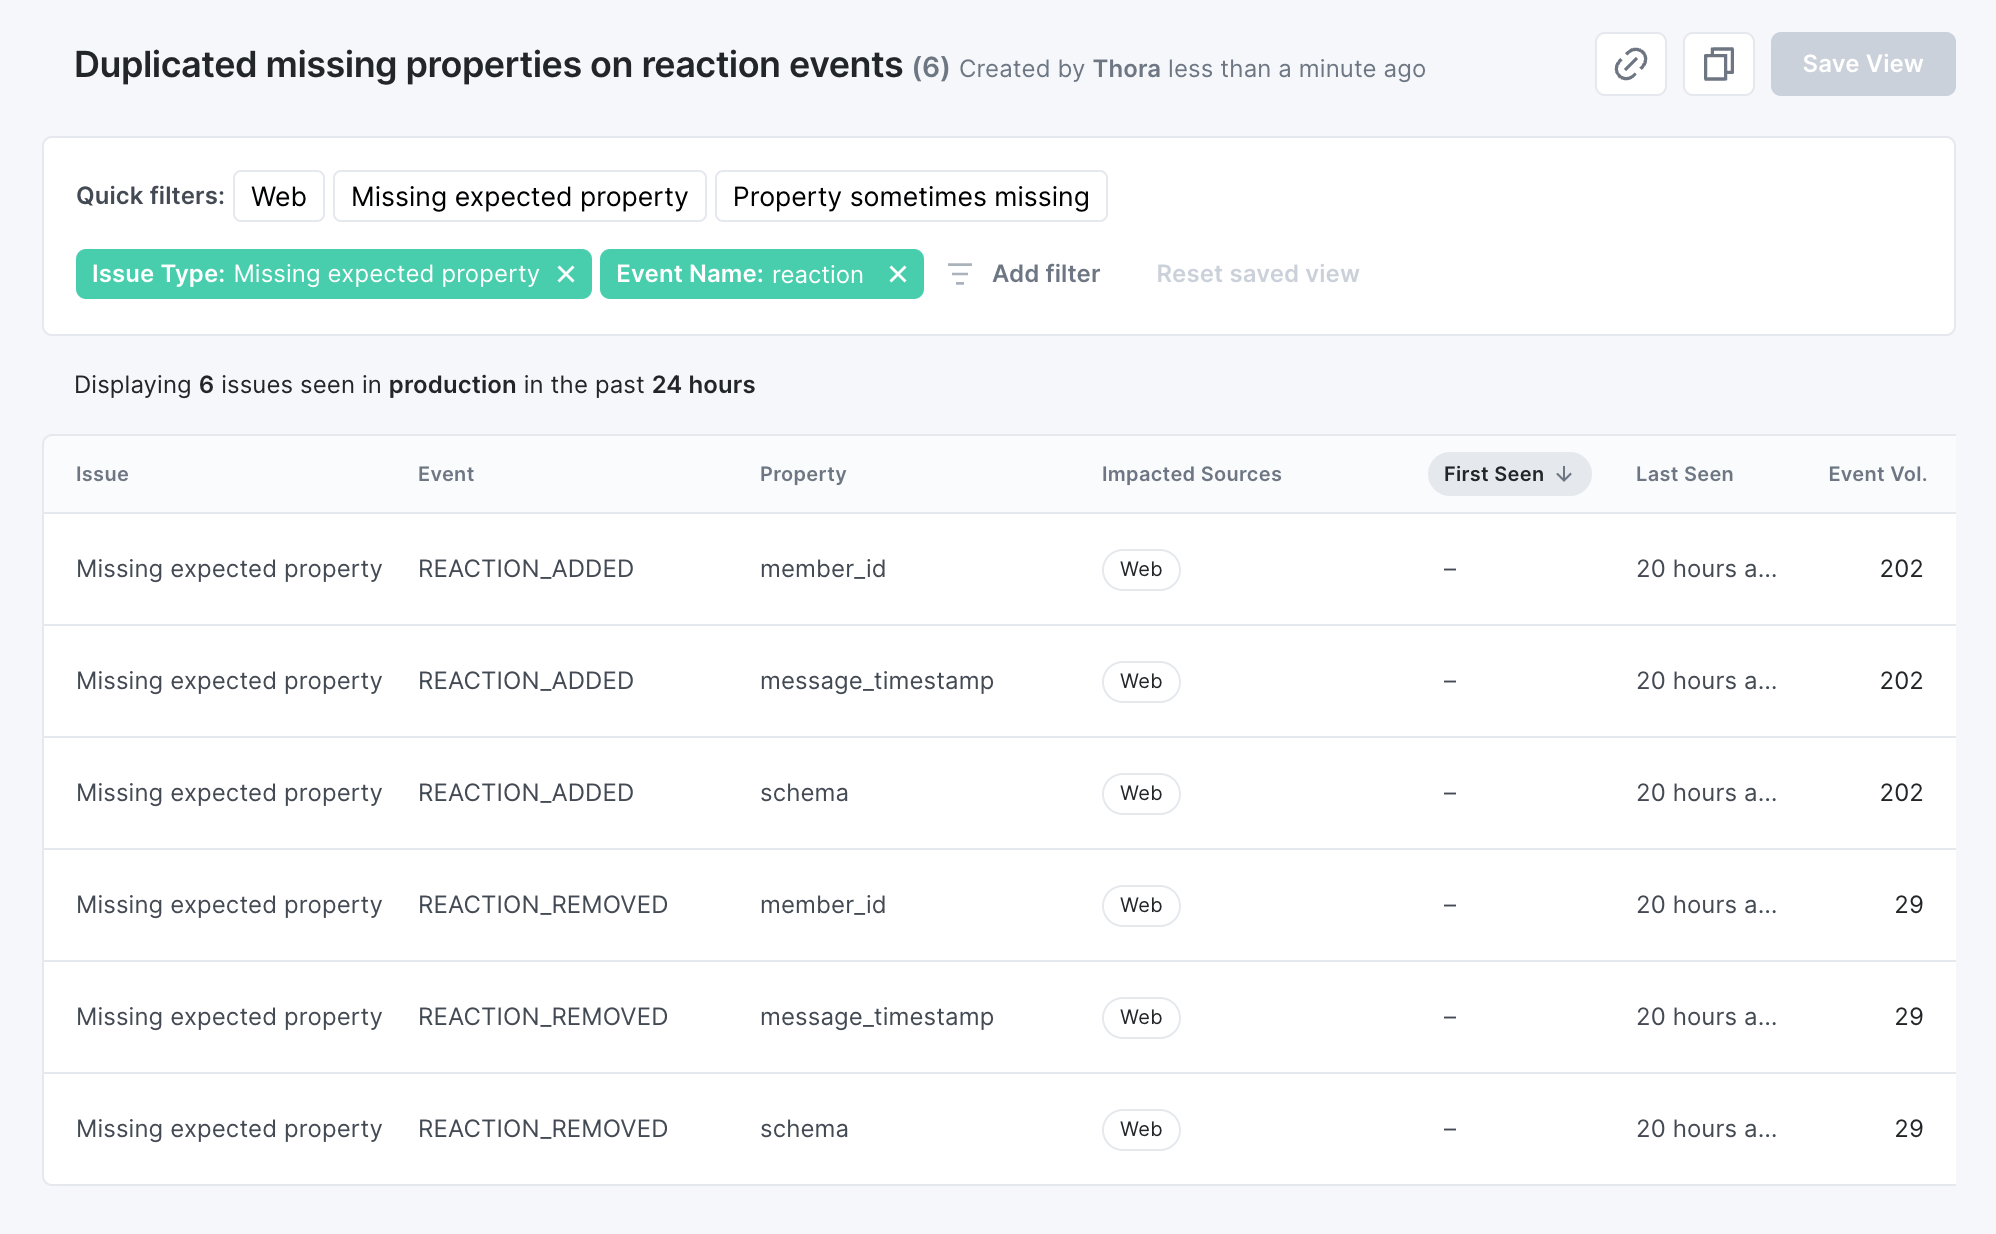
From here, modify the duplicated view by changing the filters or sort order and save the changes by clicking the “Save View” button.
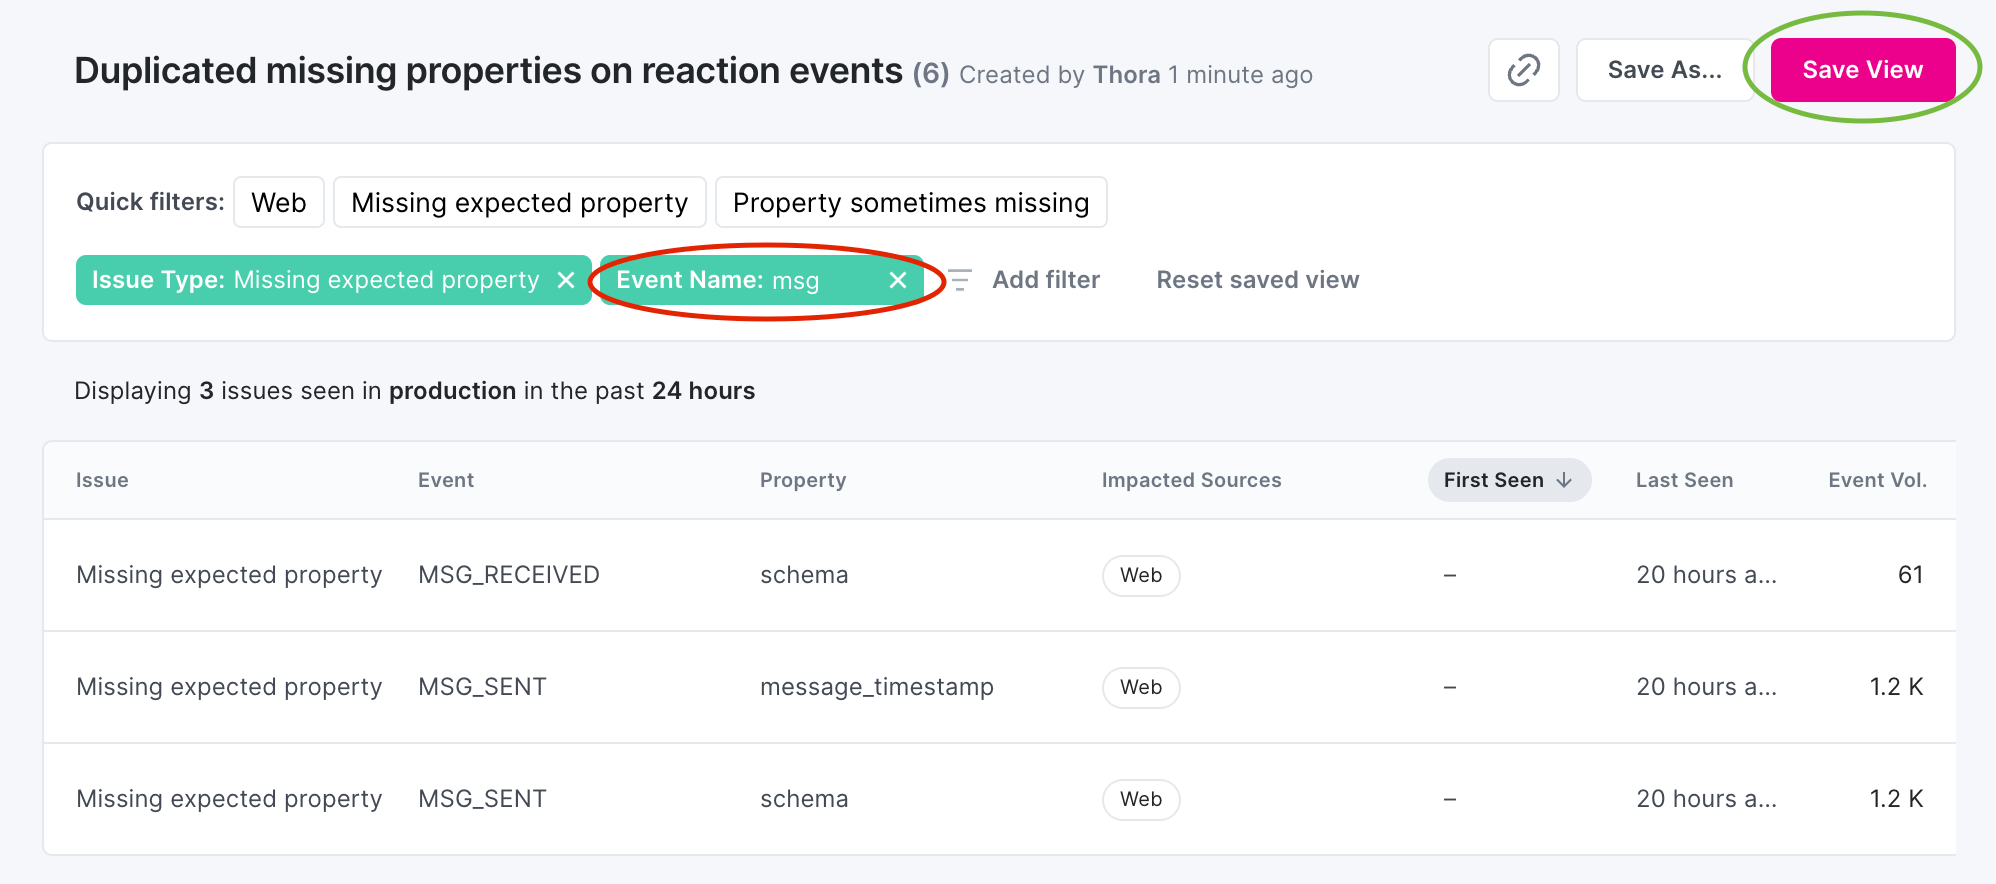
Modify and Save as
To modify an existing saved view, adjust the filtering or sort order to your current needs.
- Changes won’t be saved until you click the save button.
- Editors can only save changes to their own views.
When a saved view has been modified, the following options are present:
- Save View: save changes to the now-modified view (available only if you are the creator of the saved view or a Workspace Admin)
- Save as: save a copy of the now-modified view under a new name (available to all user)
- Reset saved view: reset all filters and sort order to latest saved state of the saved view
Below is an example of a saved view that has been modified but not saved with the changes.
To save the changes as a new saved view, click “Save as…”, give it a new name and save the changes.
Sharing a saved view
To share a saved view with a colleague, click the link button to copy the URL of the saved view. The copy link to view button is on all views (including those that are not saved).
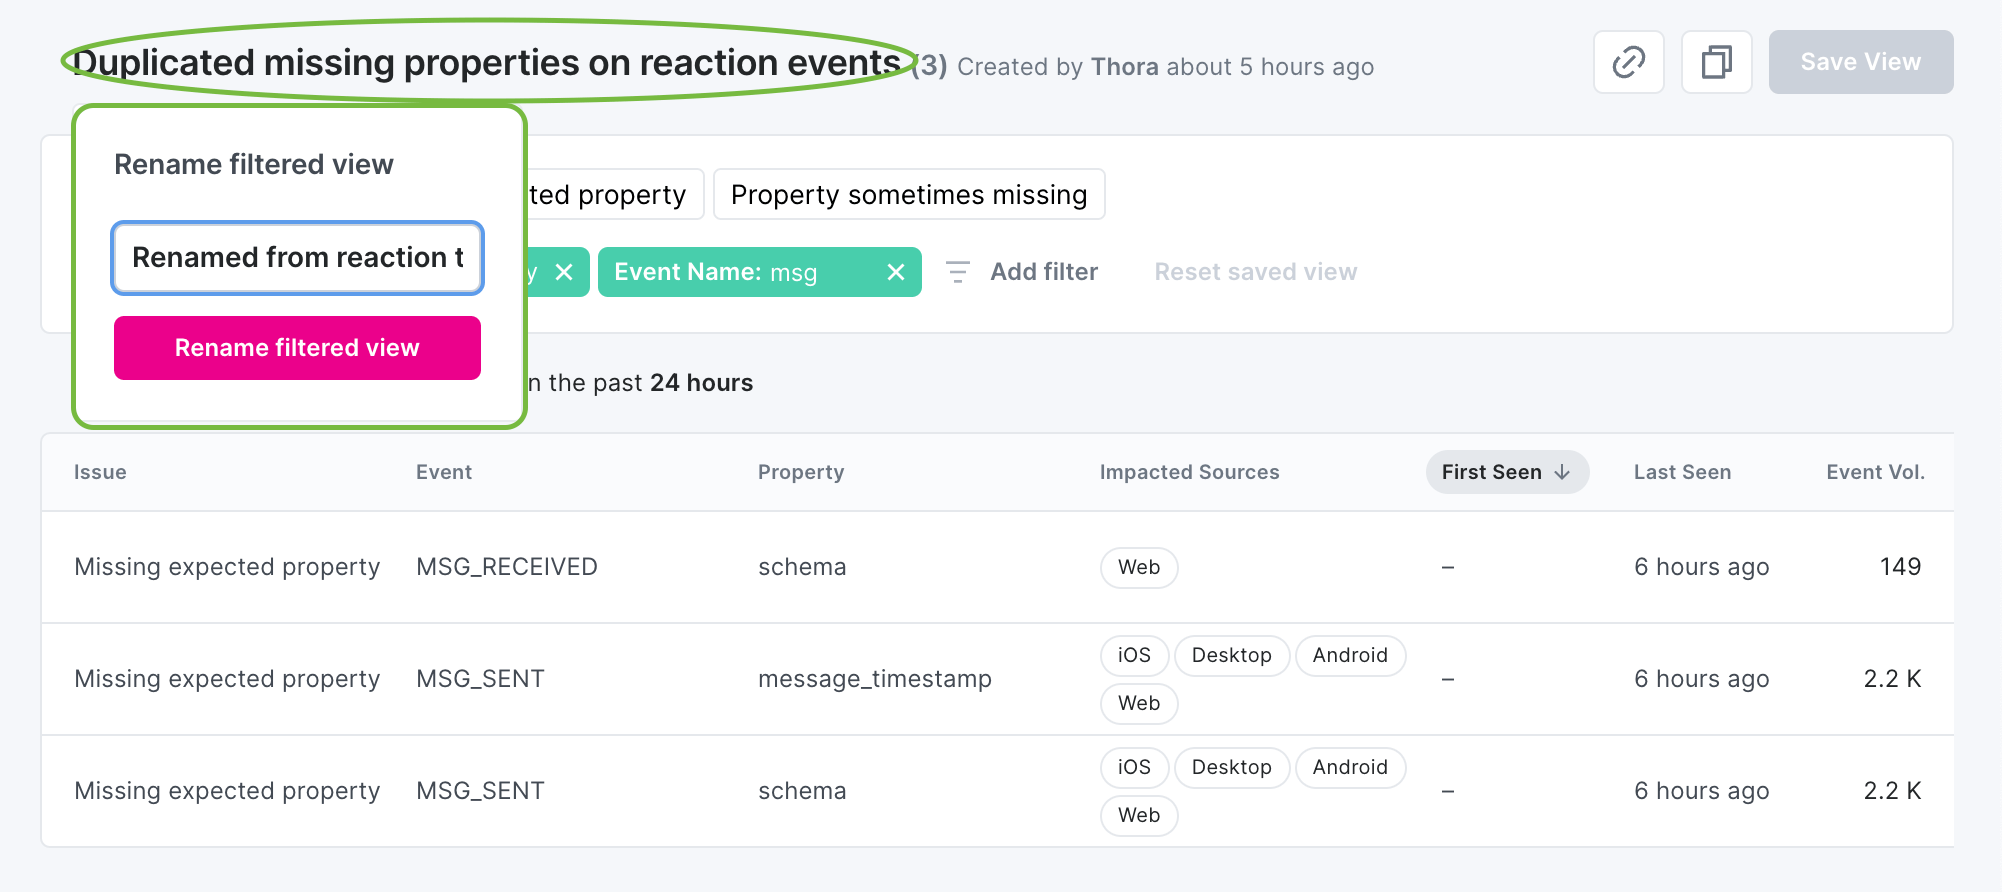
Renaming a saved view
To rename a saved view, click the title of the saved view to open a modal to rename it and save the changes.
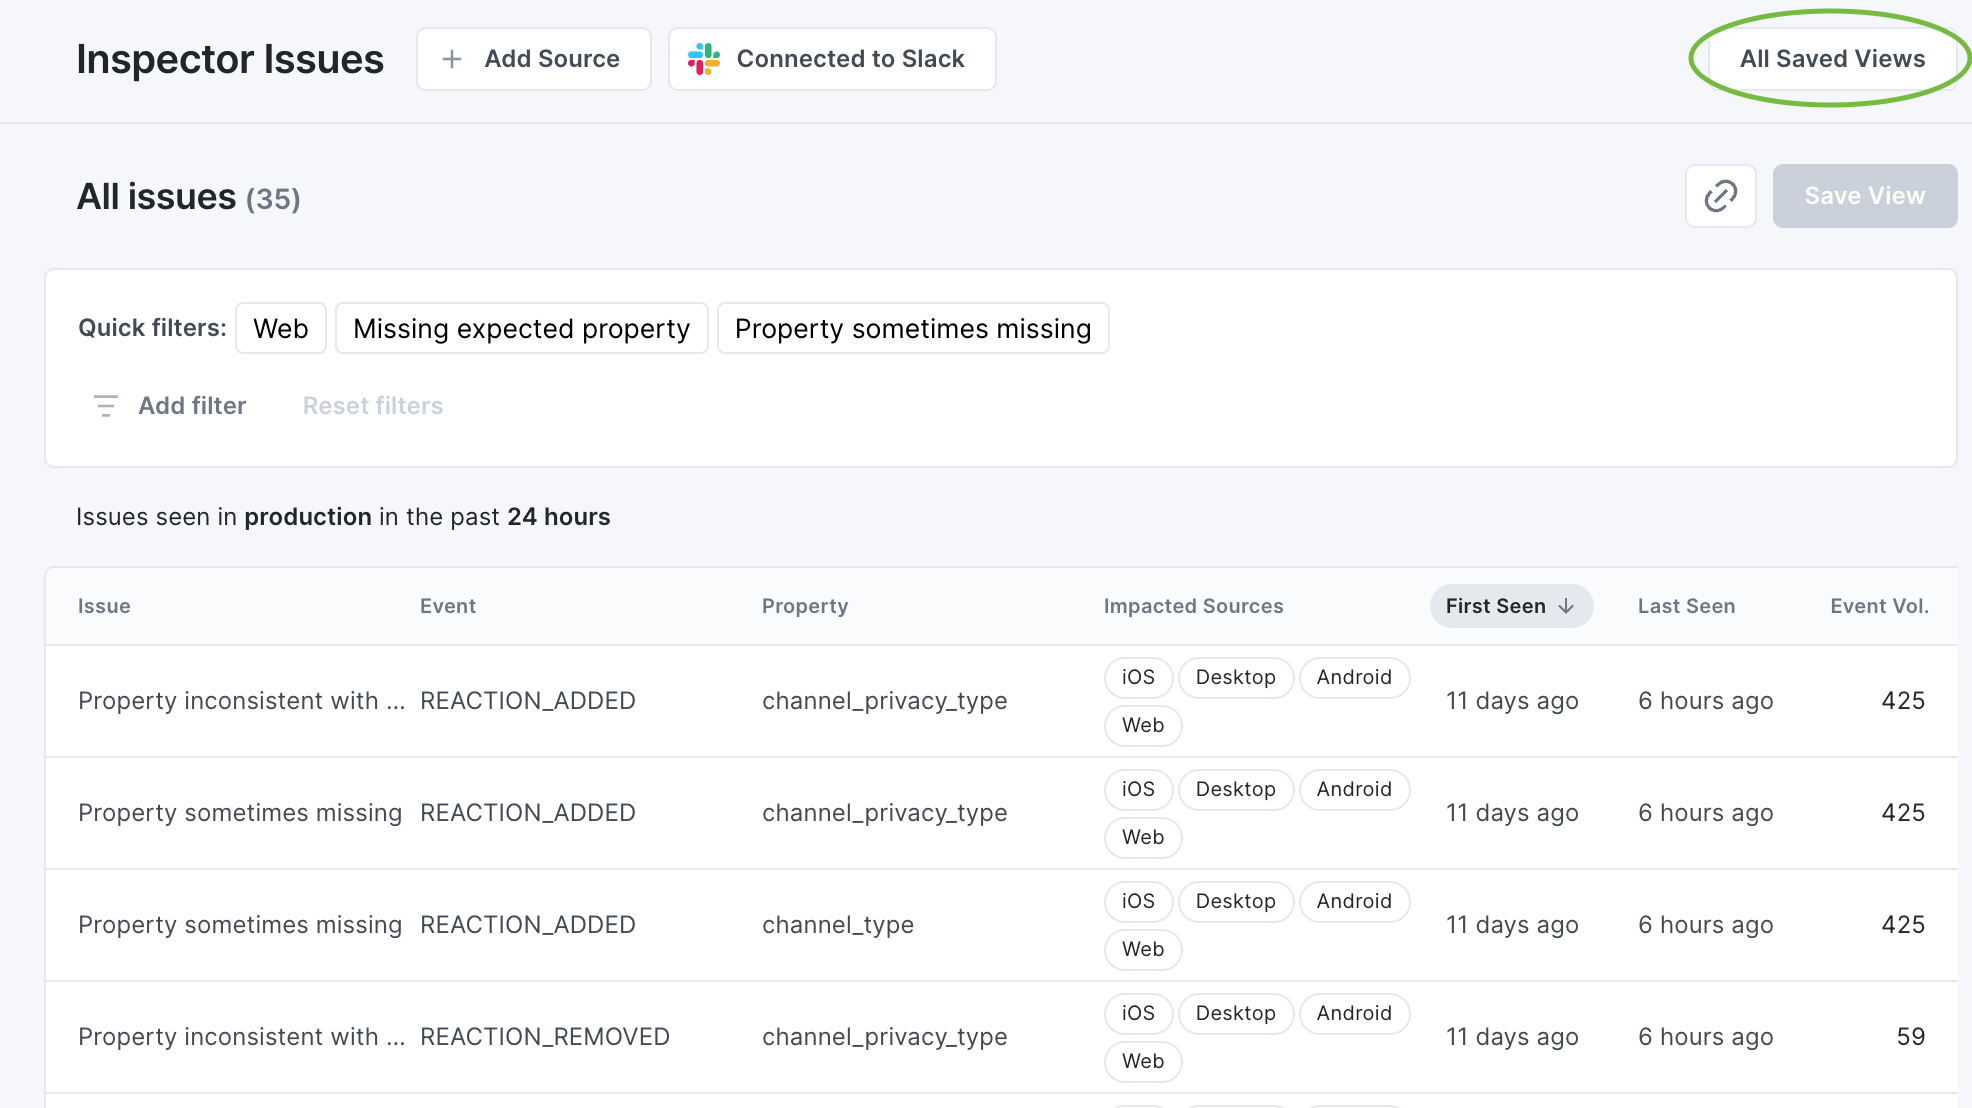
Accessing existing saved views
To find and access saved views that you or other workspace members have created, click the “All saved views” button in the top right corner of any Inspector Issues view.
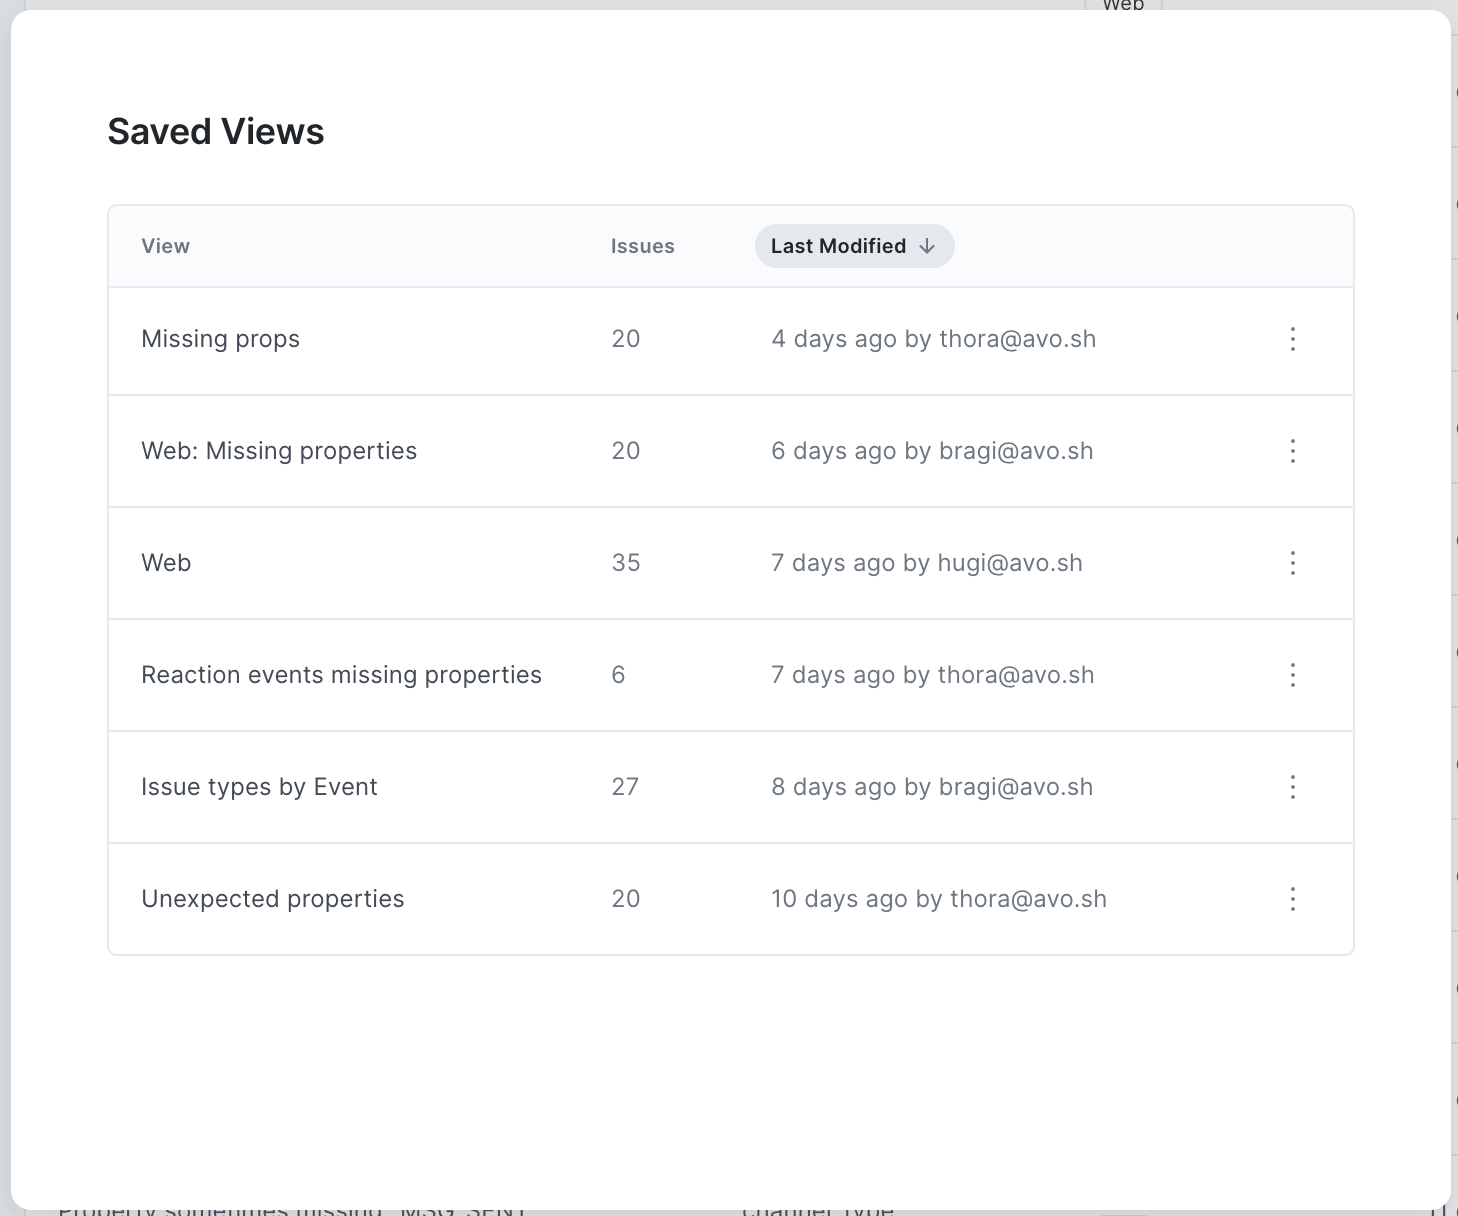
There you will find an overview over all saved views with information about:
- How many issues you they contain
- When the view was last modified
- Who last modified the view
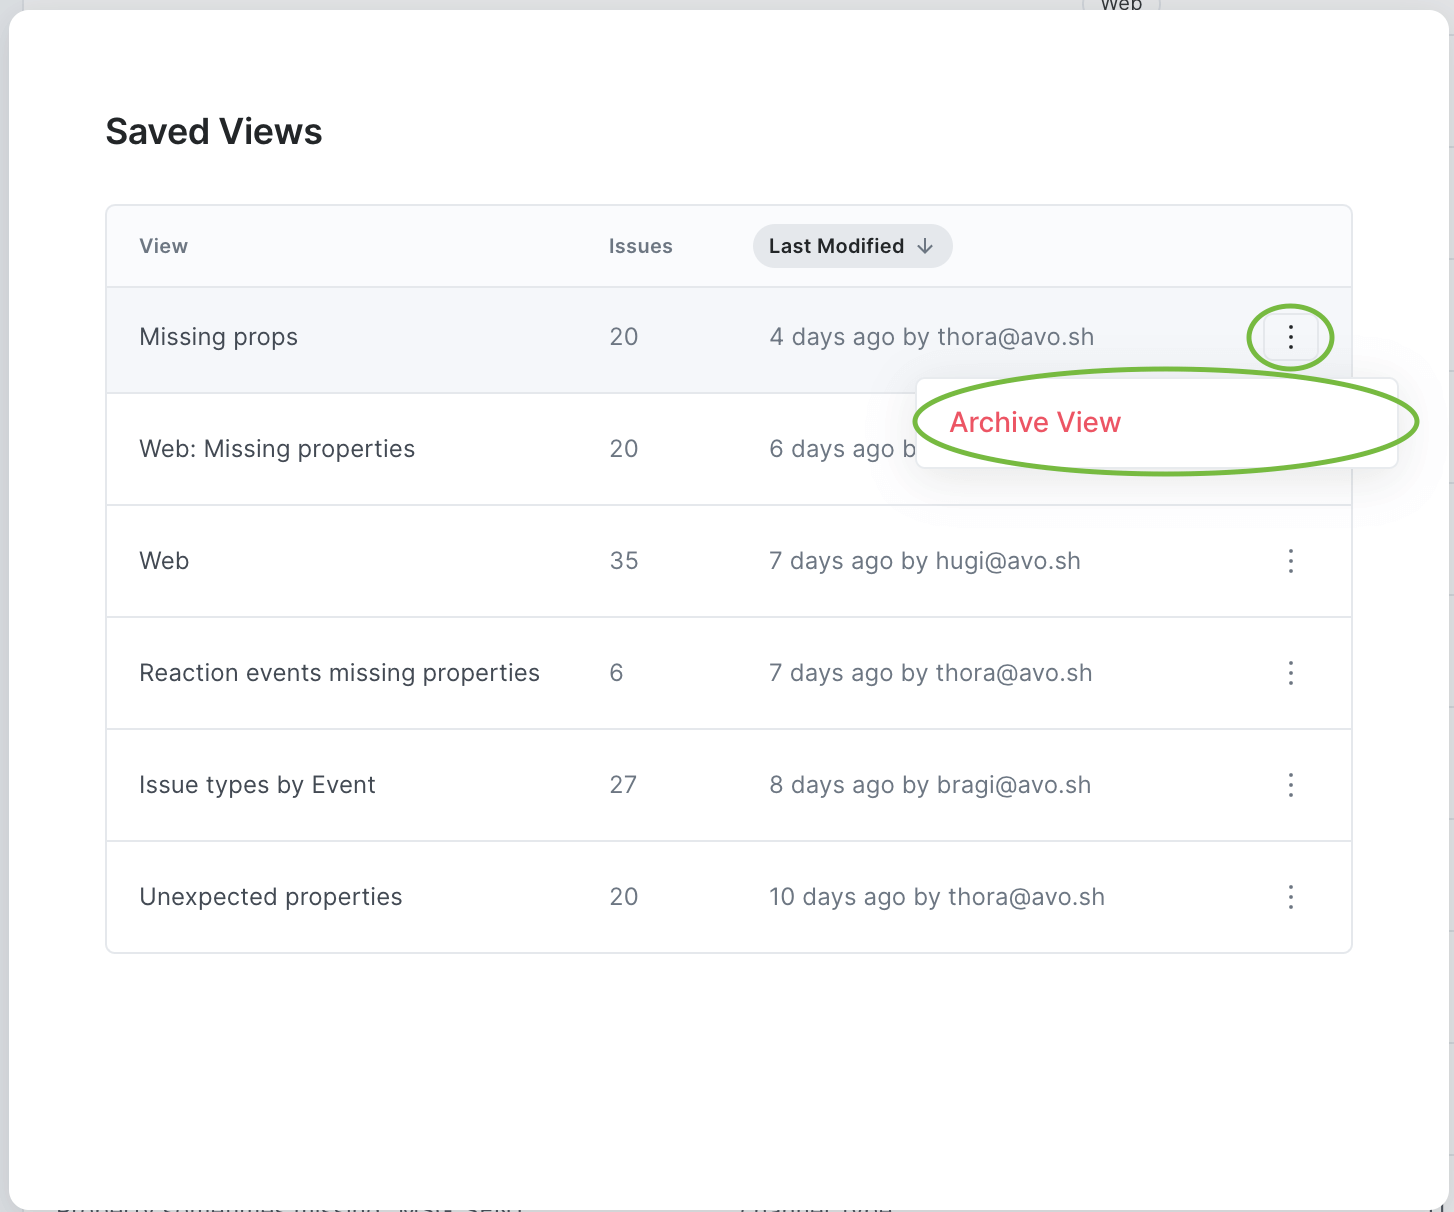
From here, the creator of each saved view and Workspace Admins can archive saved views by opening the three dot menu on the right and click the Archive View button.
Troubleshooting
Why are there no issues in my saved view?
The issues view currently only displays issues from the past 24 hours in production. That means that if you don’t have any issues in the past 24 hours for the filters that define your saved view, then you won’t see any issues. Yay!
Why are there no issues in my unfiltered issues view?
Check out troubleshooting the issues view.
What’s next?
Once you’ve created your first saved filter view in Inspector Issues, it’s time to connect Inspector Alerts to know about any new issues and start working on fixing your existing ones to systematically get to better data, one resolved issue at a time.
